Customer Setup - Zendesk
This guide explains what you, as the customer, need to provide to enable the integration between Zendesk Livechat and our platform.
1. Create Conversation API
- Click on the 4 tile icon on header (Right)
- Select Admin Center
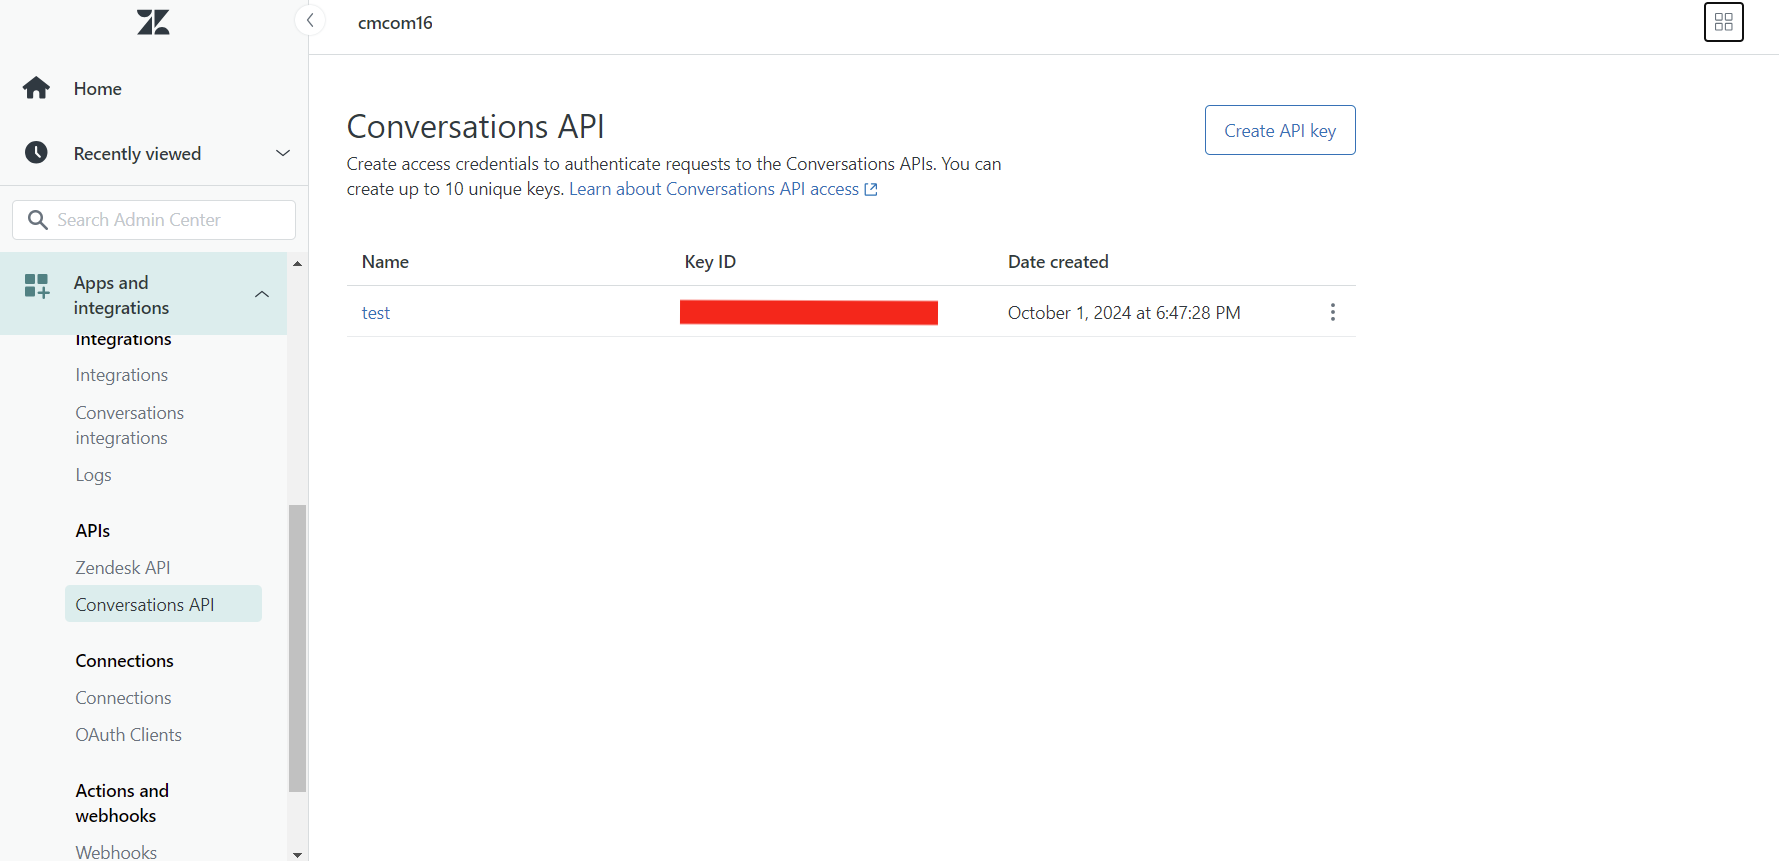
- Navigate to App and Integrations > APIs > Conversation API
- Click Create API Key
- Give a name and click Create
- Copy the following credentials: App ID, Key ID, Secret Key
Warning: Secret Key will only be generated once, so make sure to keep it safe. You can't generate or see it again.
2. Create New Integration
-
Navigate to Admin Center > Apps and Integrations > Integrations > Conversation Integrations
-
Click on Create Integration
-
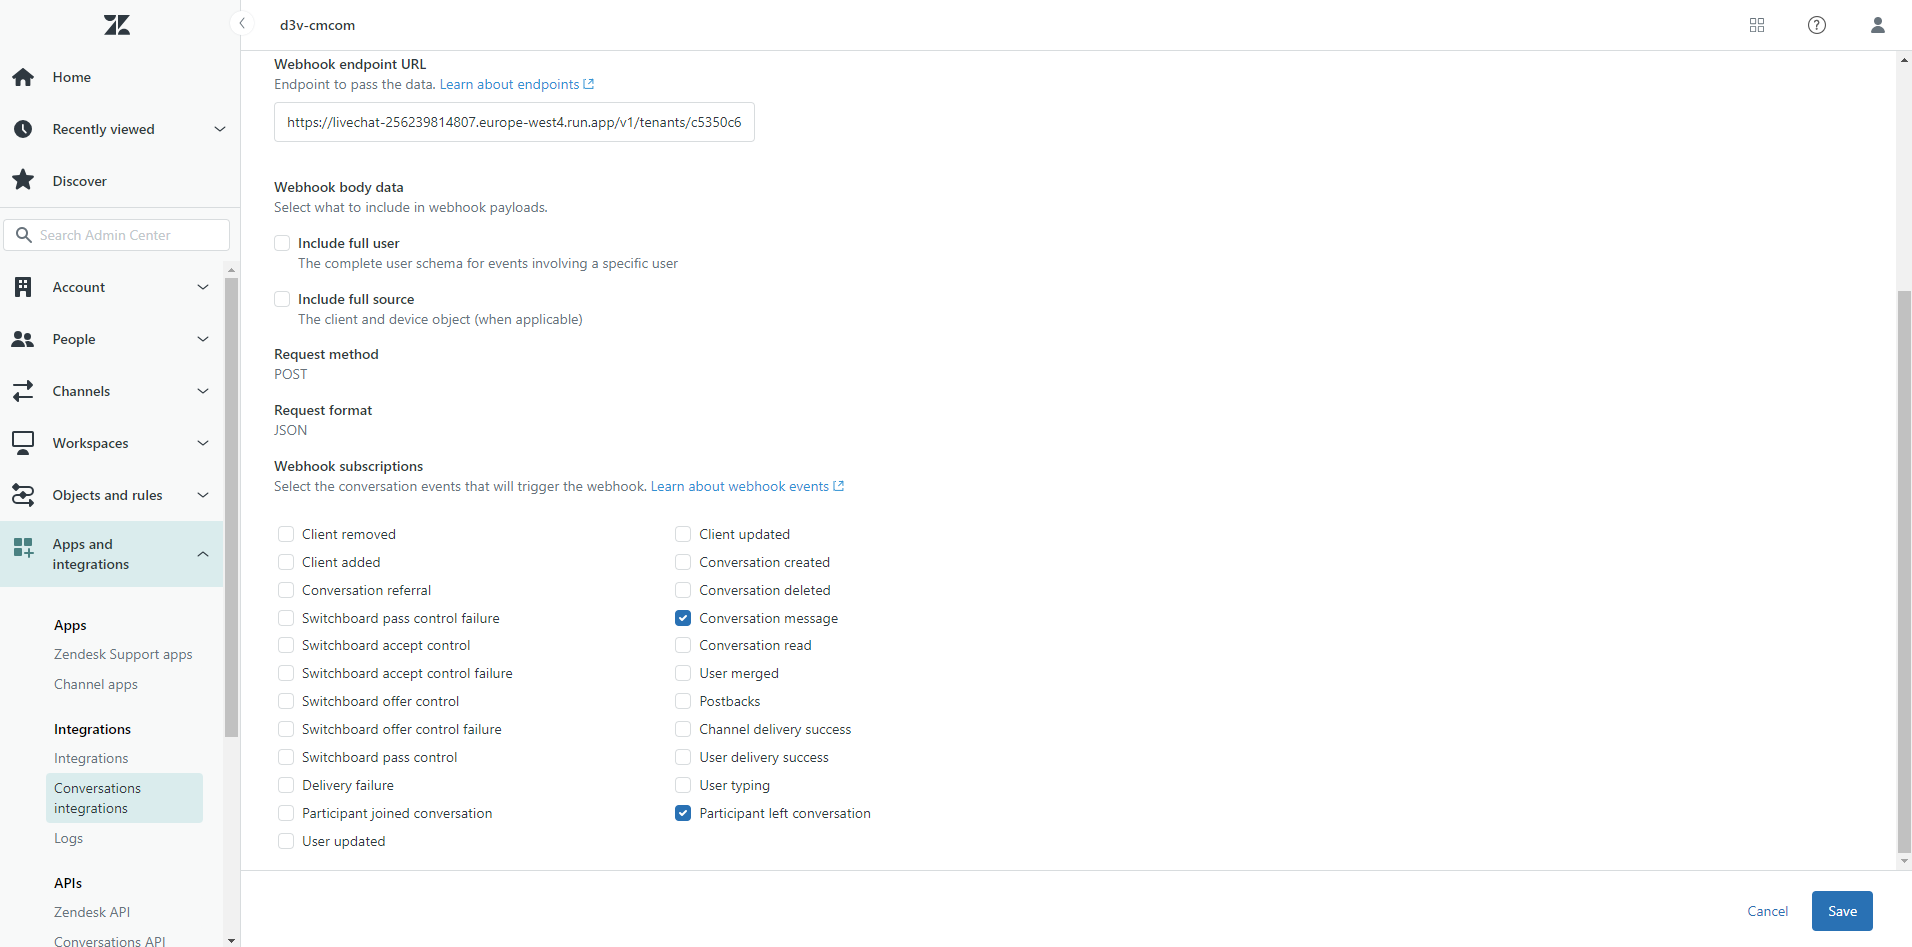
Configure the integration:
- Give a name
- Copy the Webhook URL from Marketplace UI and paste it in Webhook URL
- Keep everything else as default
- For Webhook subscriptions, select:
- Conversation Message
- Participant Left Conversations
-
Save the integration
3. Create Zendesk API Token
- Navigate to Admin Center > Apps and Integrations > APIs > Zendesk APIs
- Click on Add API Token
- Copy the API Token
- Click Save
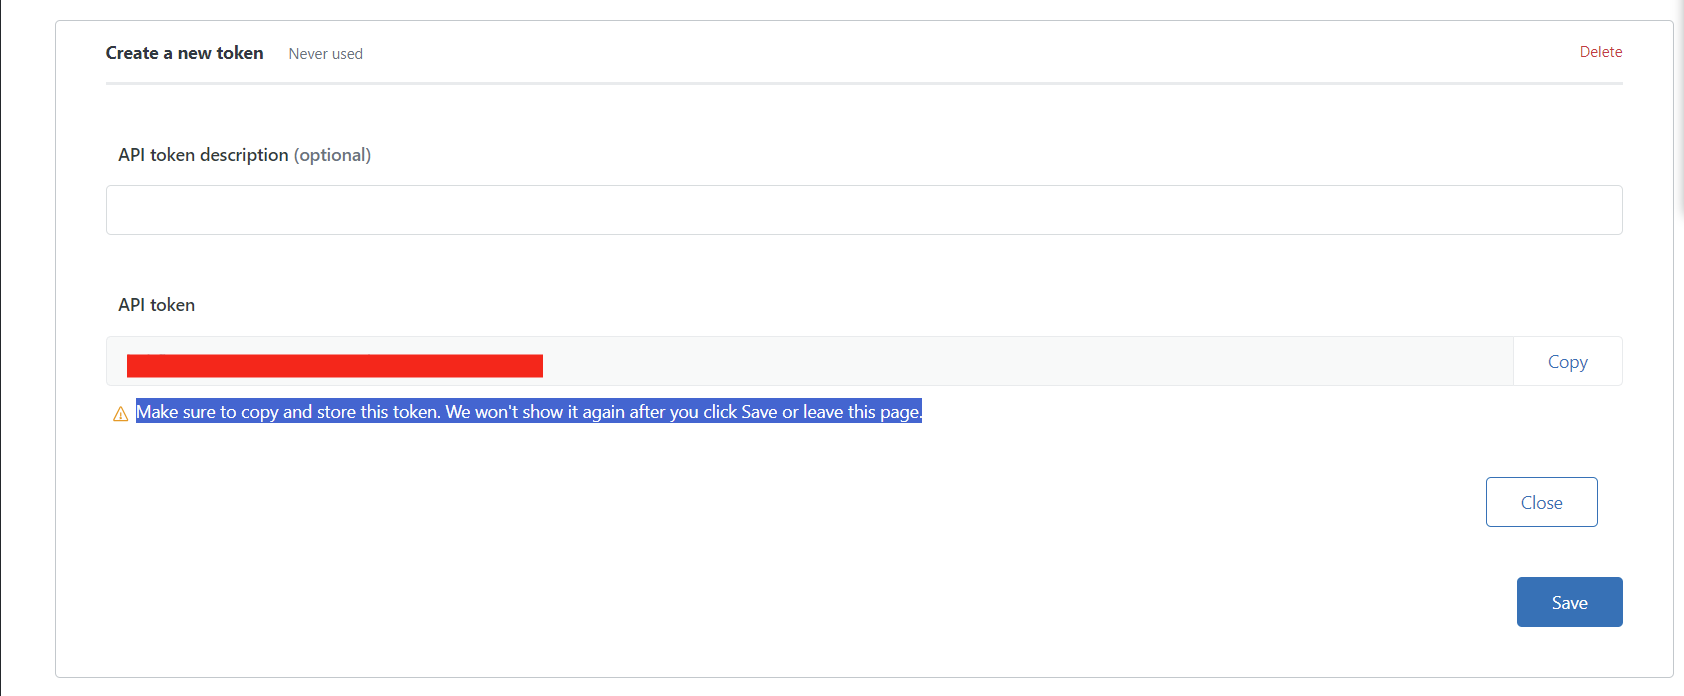
Warning: Make sure to copy and store this token. We won't show it again after you click Save or leave this page.
4. Create OAuth Client
- On the same page, click on OAuth Client

- Click Create
- Configure the client:
- Give a name
- Add fields like: company, logo, etc.
- Keep Client kind as Confidential
- Click Save
- Important: After saving, please don't click OK/Back
- Under Identifier, copy the identifier name and share it with CM. It will be OAuth Client Id
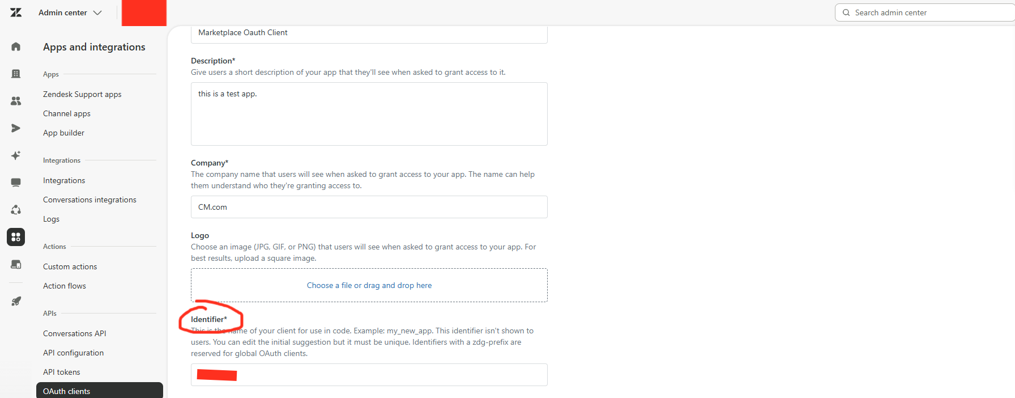
- Under Secret, A secret value will be displayed — copy that value and share it with CM. it will OAuthClientSecret

5. Setup in Zendesk
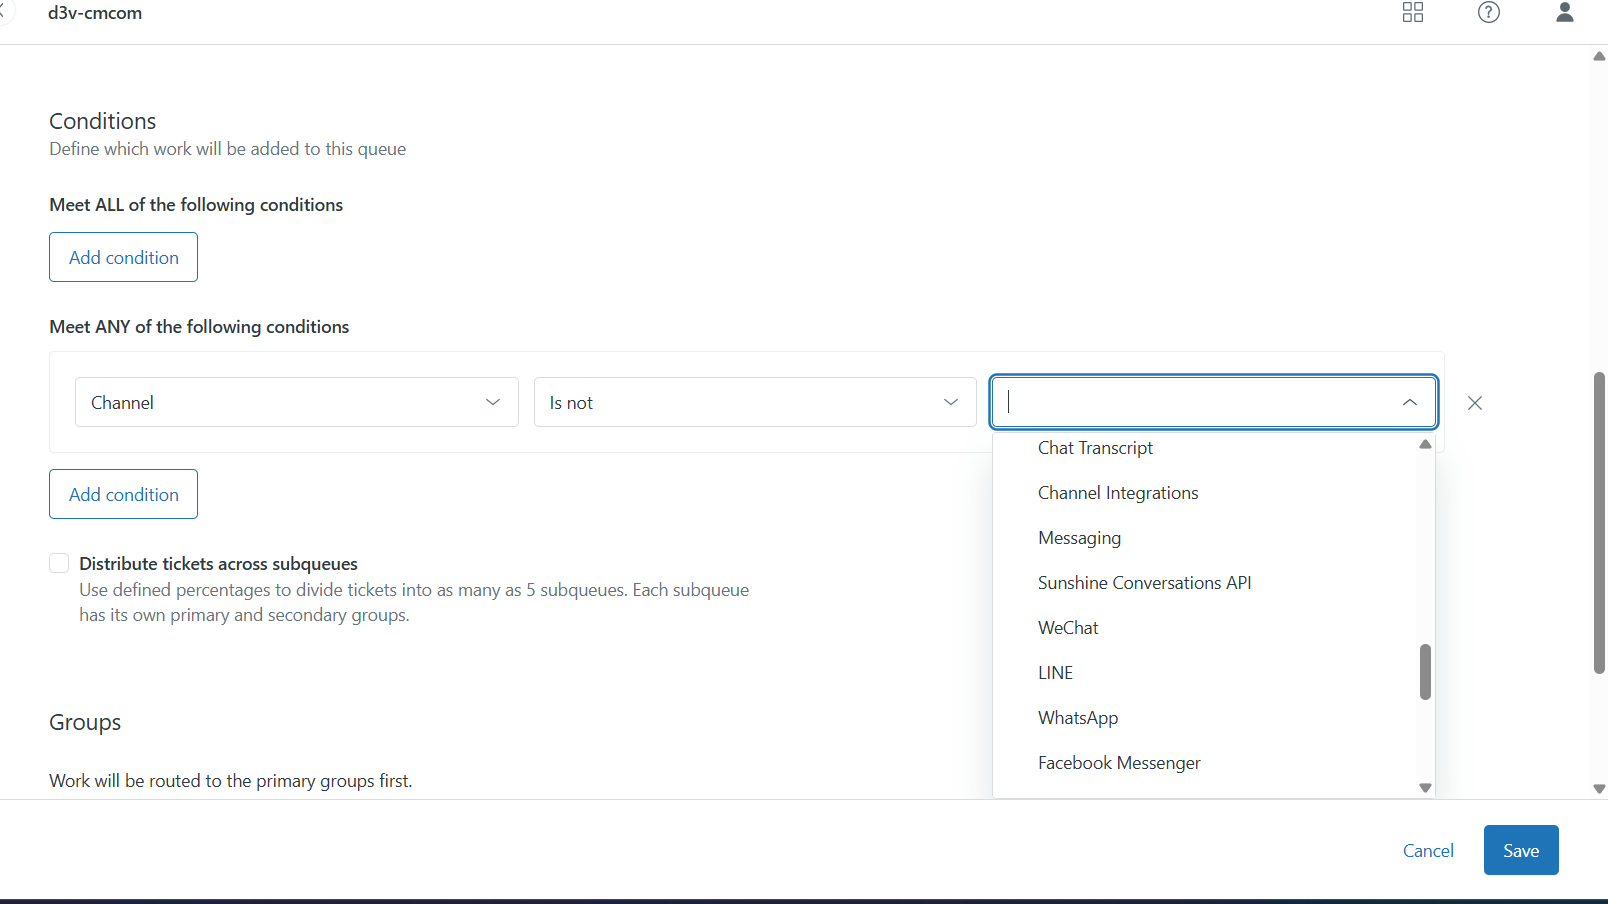
Configure Omnichannel Routing
- Customers need to set up omnichannel in Zendesk live chat. If not already configured, they may need to contact Zendesk support for assistance
- In Admin Center, navigate to Objects and Rules > Omnichannel routing
- Configure queue and routing rules as per your requirements
- Make sure to include Sunshine Conversation API in the Queue
Enable Multi-Conversations for Single Users
- In Admin Center, click Channels in the sidebar
- Select Messaging and social > Messaging
- At the top of the page, click Manage settings
- Under Web Widget and Mobile SDKs, expand Multi-conversations
- Click Set up multi-conversations
- Click Turn on multi-conversations for your account
- Select the channels on which you want to offer multi-conversations
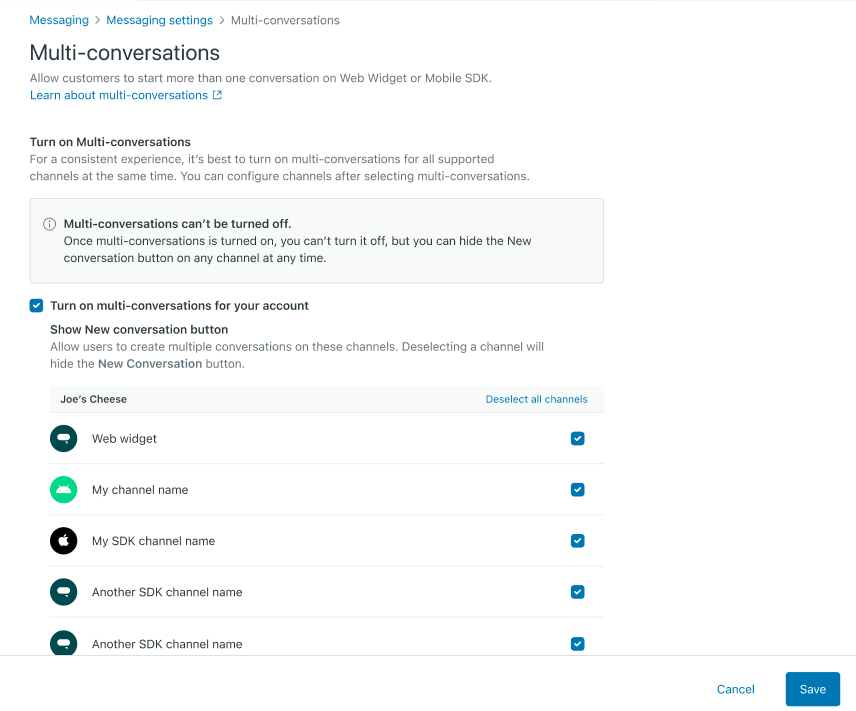
- Click Save
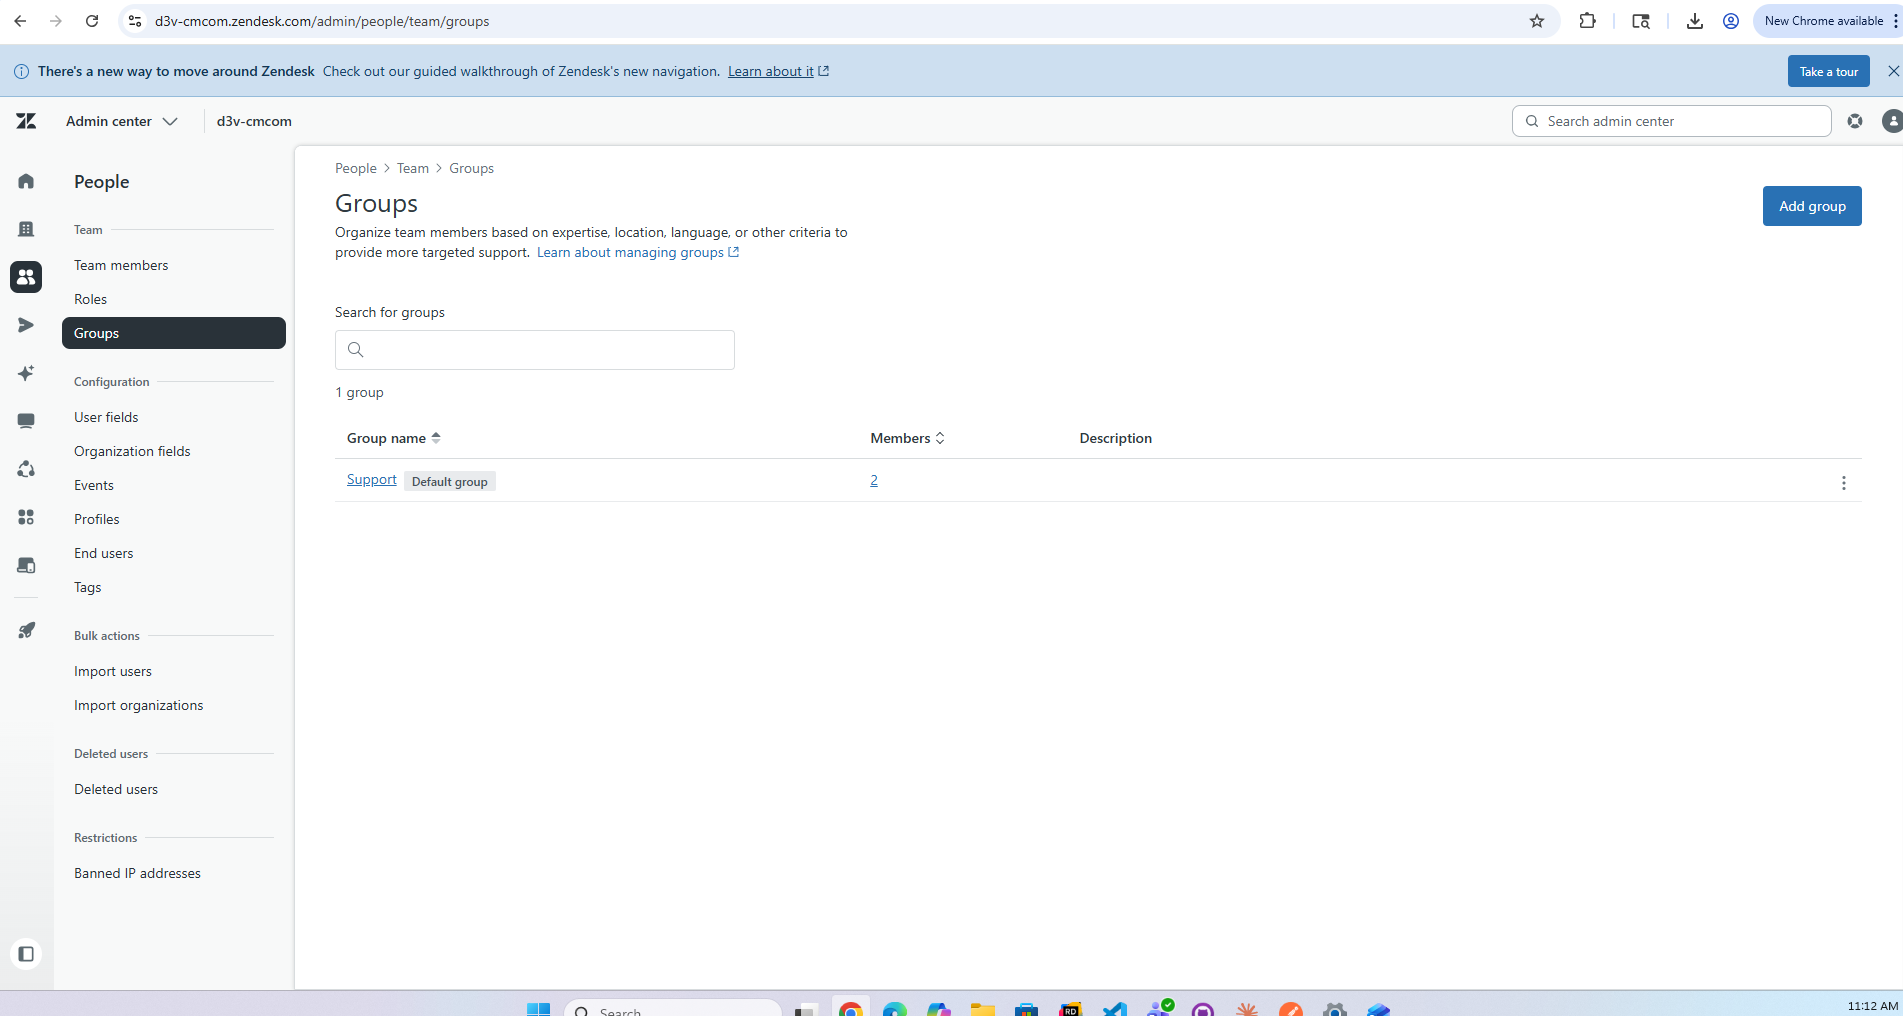
6. Get Group id from Zendesk
-
Navigate to Admin Center > People > Groups.
-
Click on the name of the group you want to identify.
-
Look at the URL in your browser address bar. The number at the end is the Group ID.
-
Example URL:
https://yoursubdomain.zendesk.com/groups/123456789(ID: 123456789).