Customer Setup - Salesforce Enhanced Chat
This guide explains what you, as the customer, need to provide to enable the integration between Salesforce Enhanced Livechat and our platform.
1. Create new Channel
-
Login to your salesforce service cloud account and then click on settings icon and then click setup.
-
Navigate to the search bar and type Messaging Settings and then click on New Channel
-
In the Native Channels tab select Enhanced Chat and click next.
-
Fill the details form and click next.
-
Select the suitable routing type for your channel and click save.
-
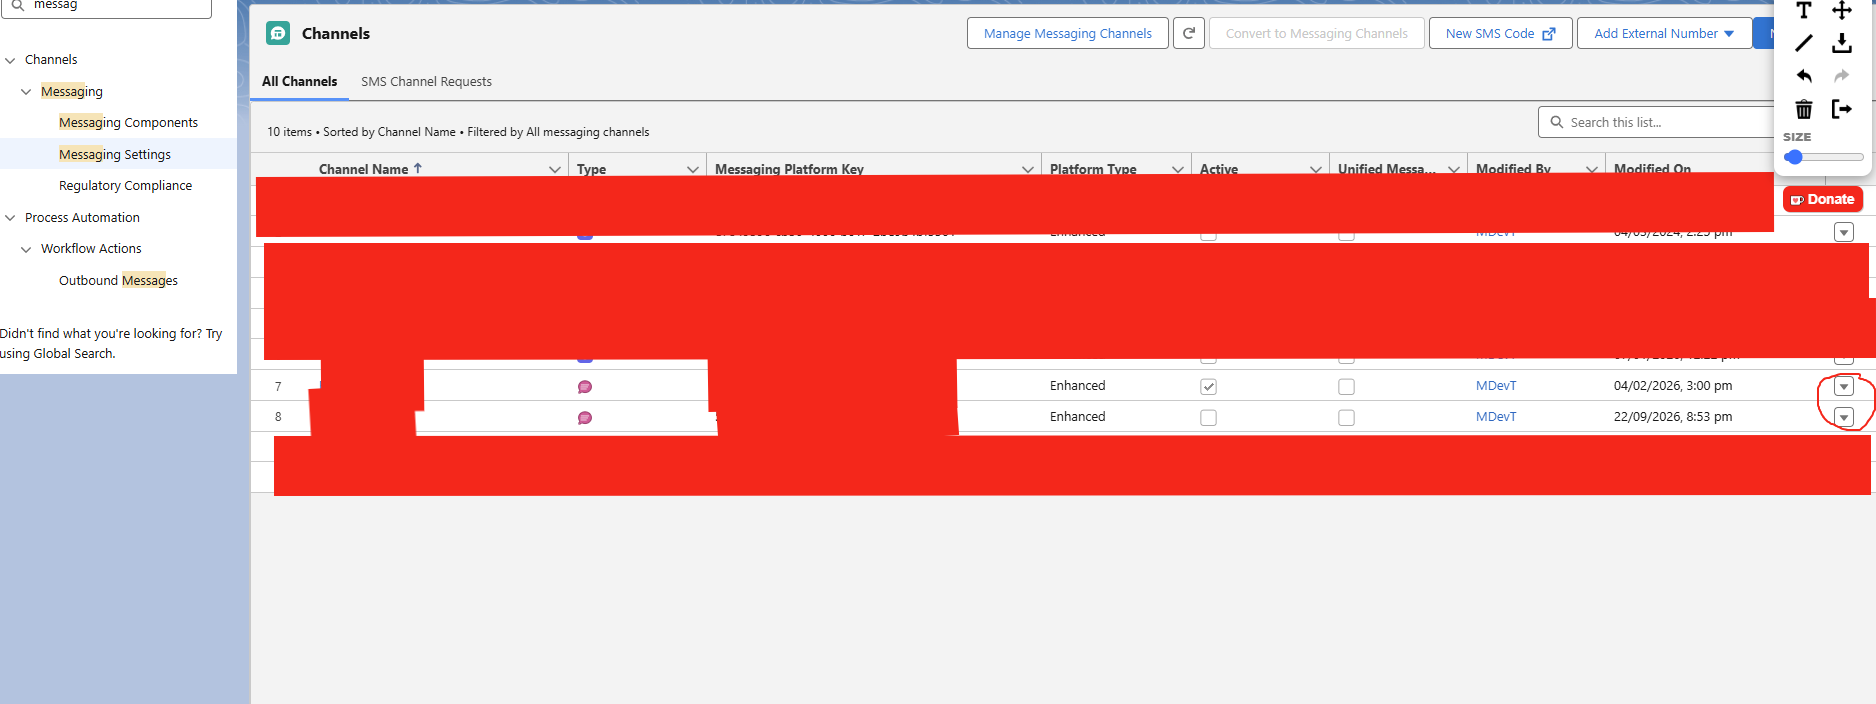
After clicking save locate the channel in the list and select edit as shown below in circle
-
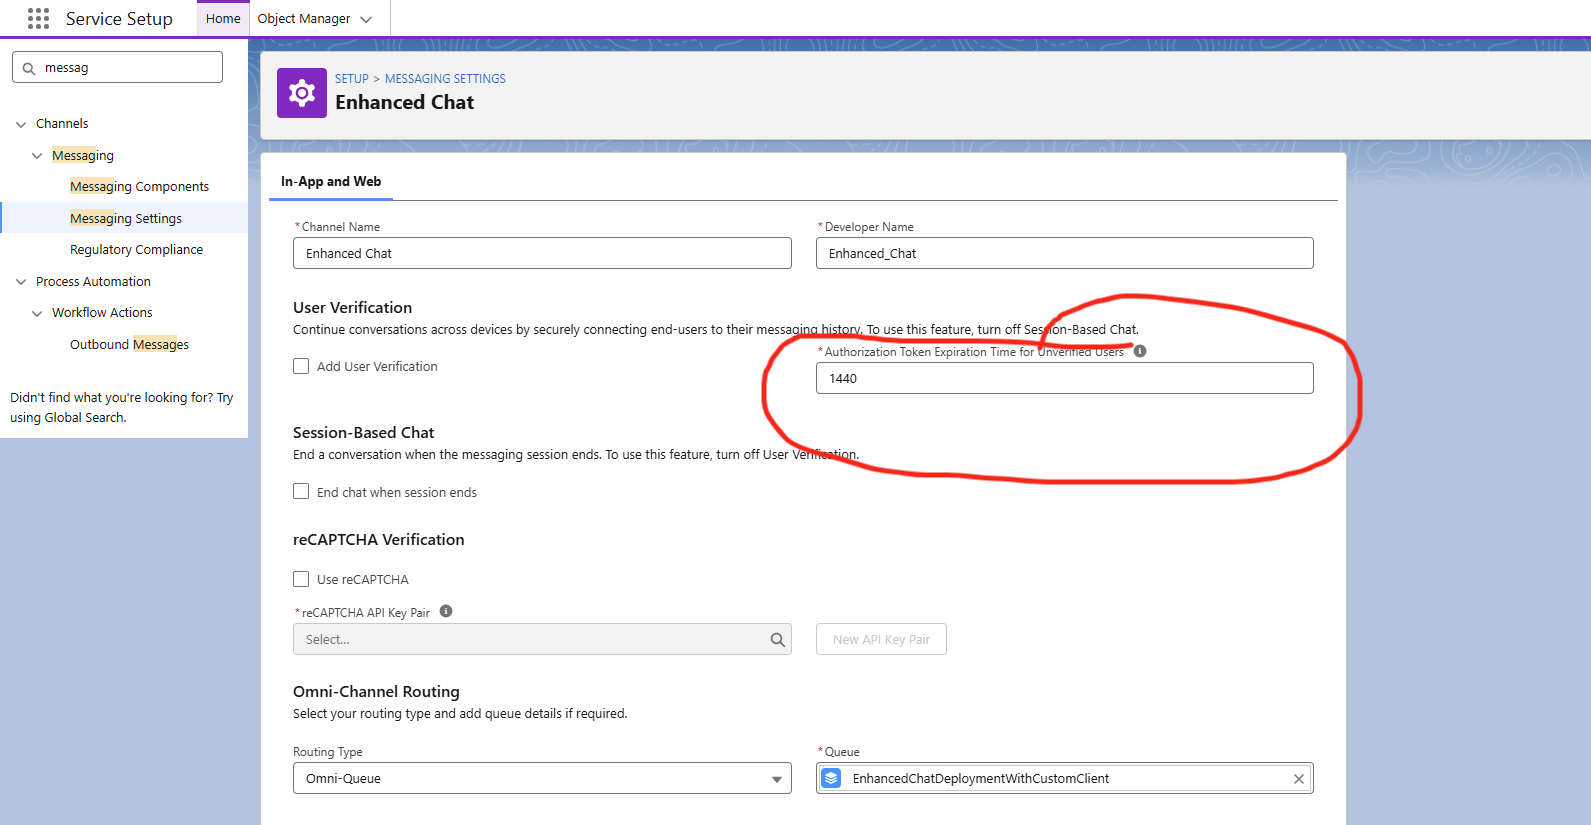
Set the Authorization Token Expiration Time for Unverified Users as 1440
2. Create an Embedded Service Deployment
-
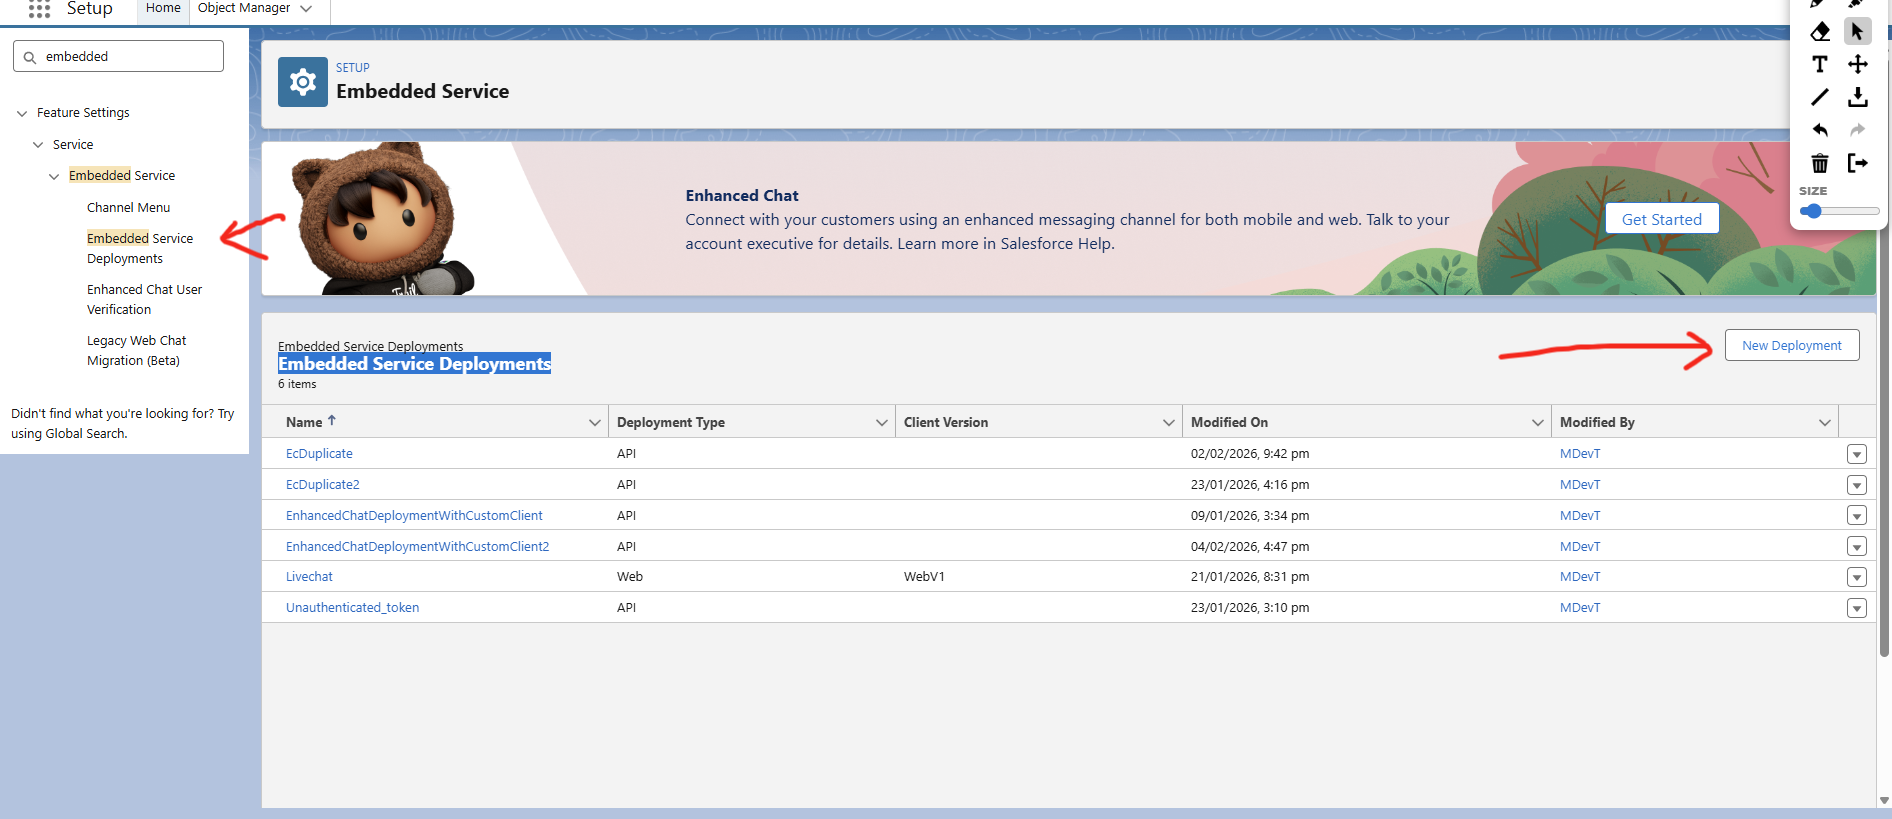
Navigate to the search bar and type Embedded Service Deployments and then click on New Deployment.
-
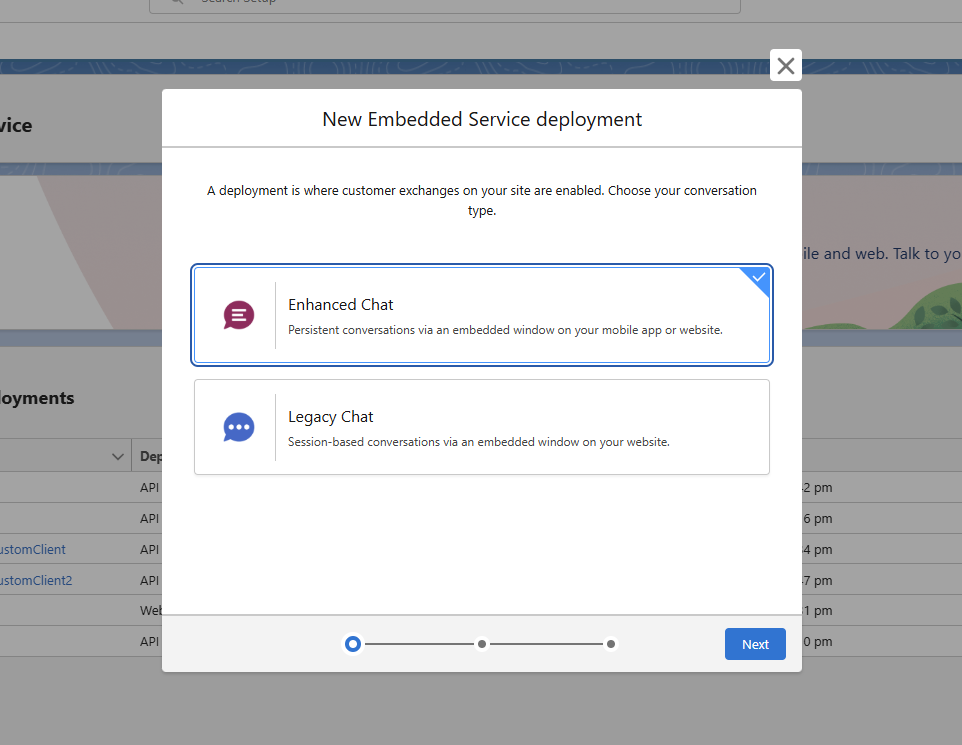
Select Enhanced Chat and click next.
-
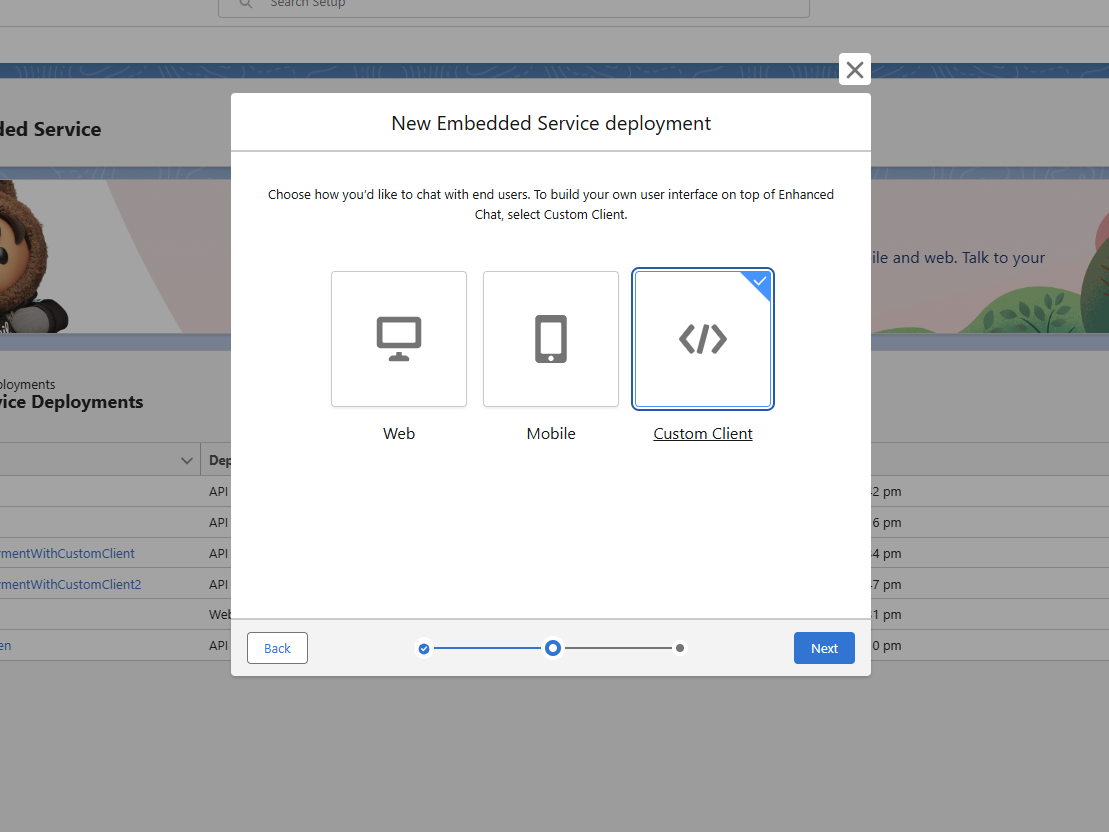
In the next page select Custom Client and then click next.
-
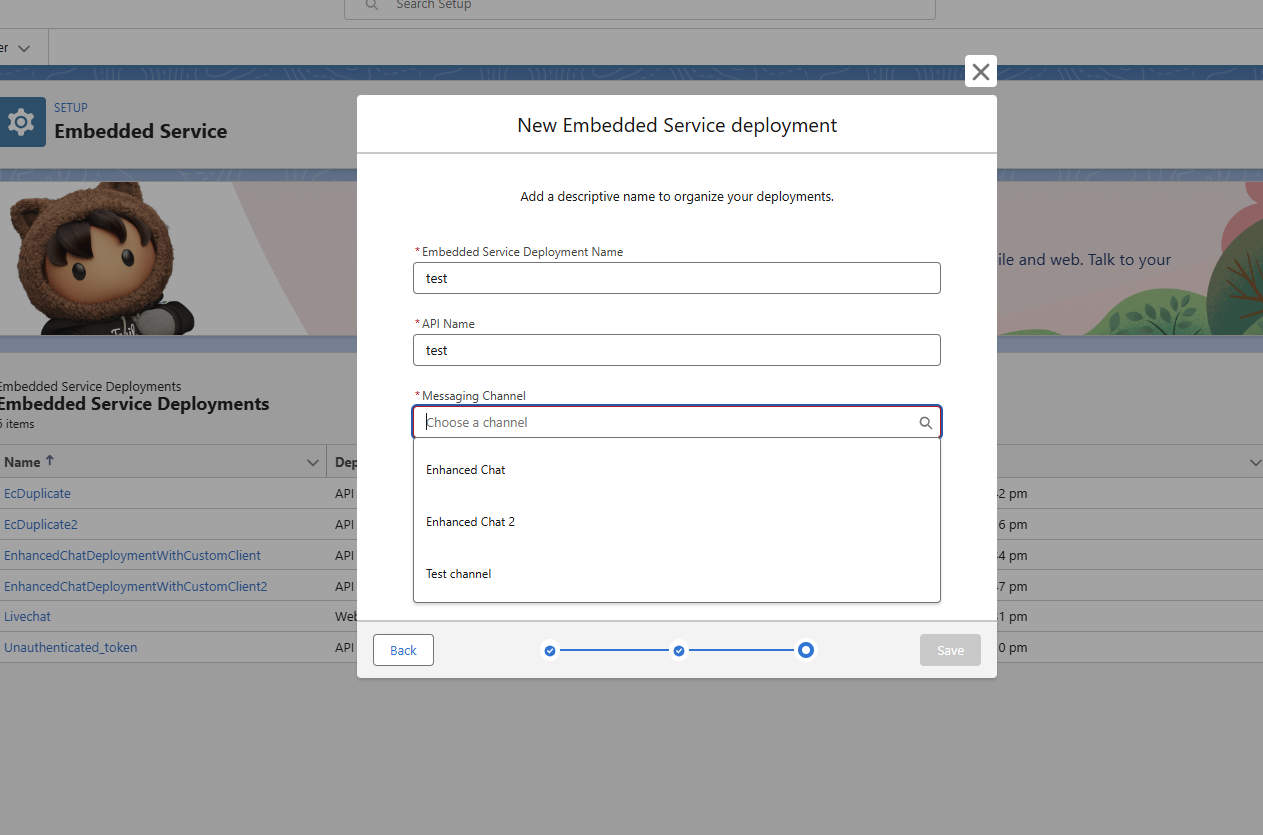
In the next page fill the form and then choose the appropriate Messaging channel that we created earlier then click save.
-
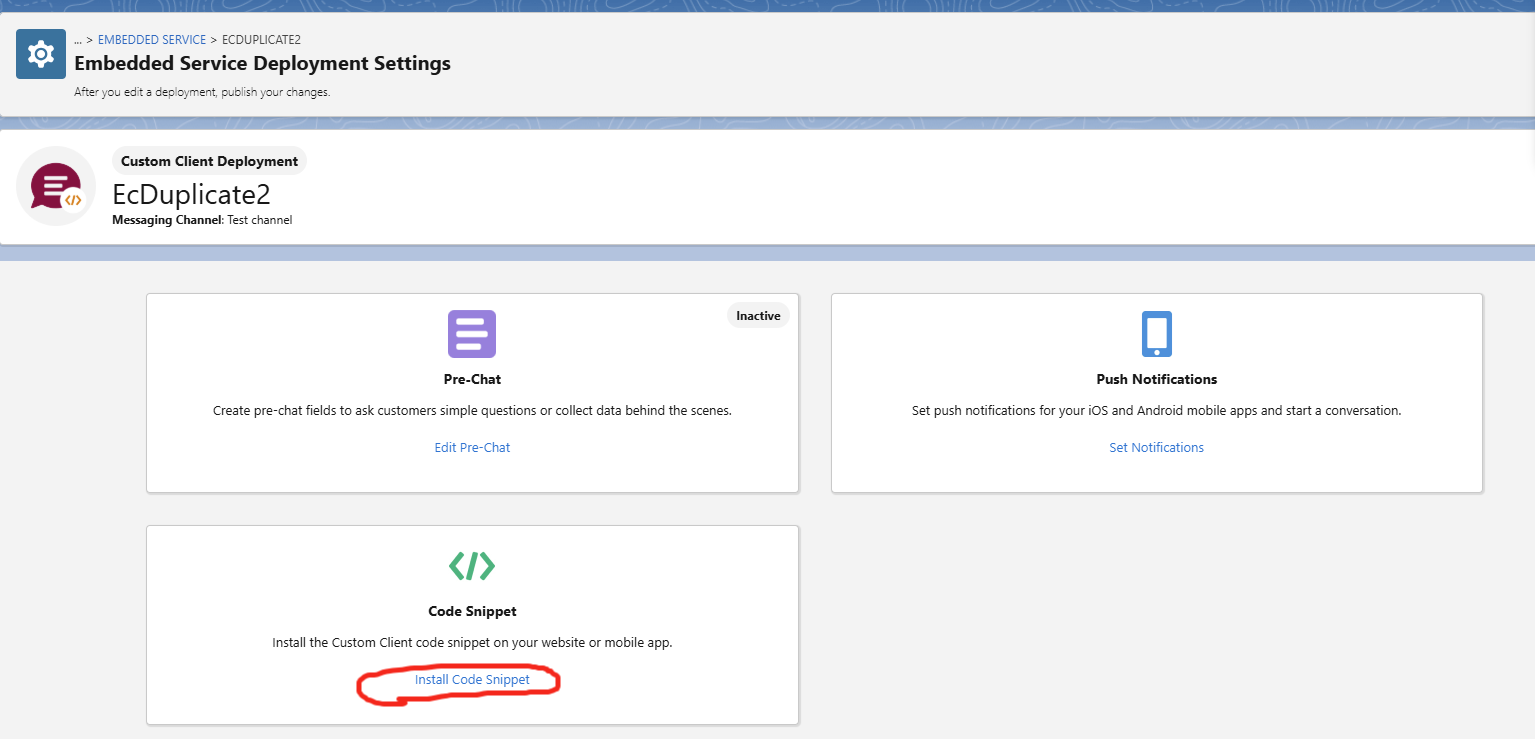
Click on the new deployment that we just created then click on the Install Code Snippet.
-
**Note **down the custom client code snippet data: OrganizationId, DeveloperName, Url.
3. Create new External Client App
-
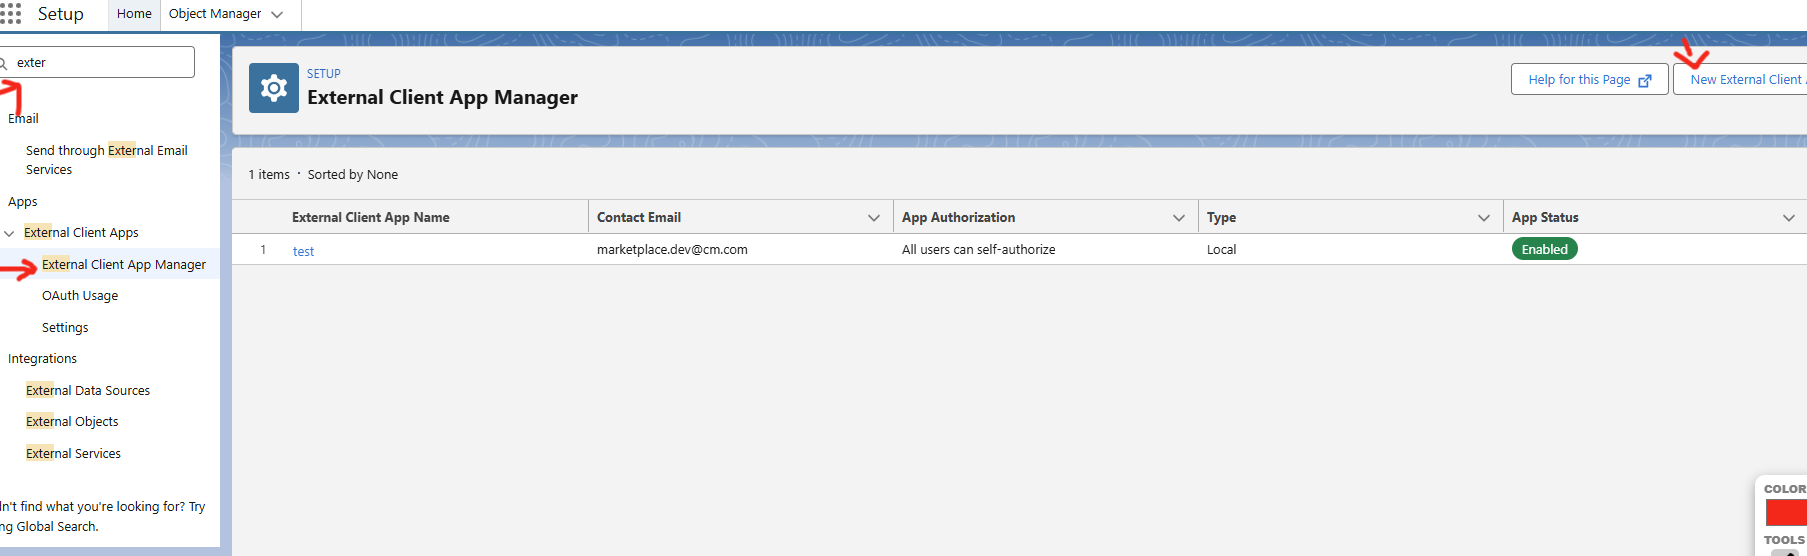
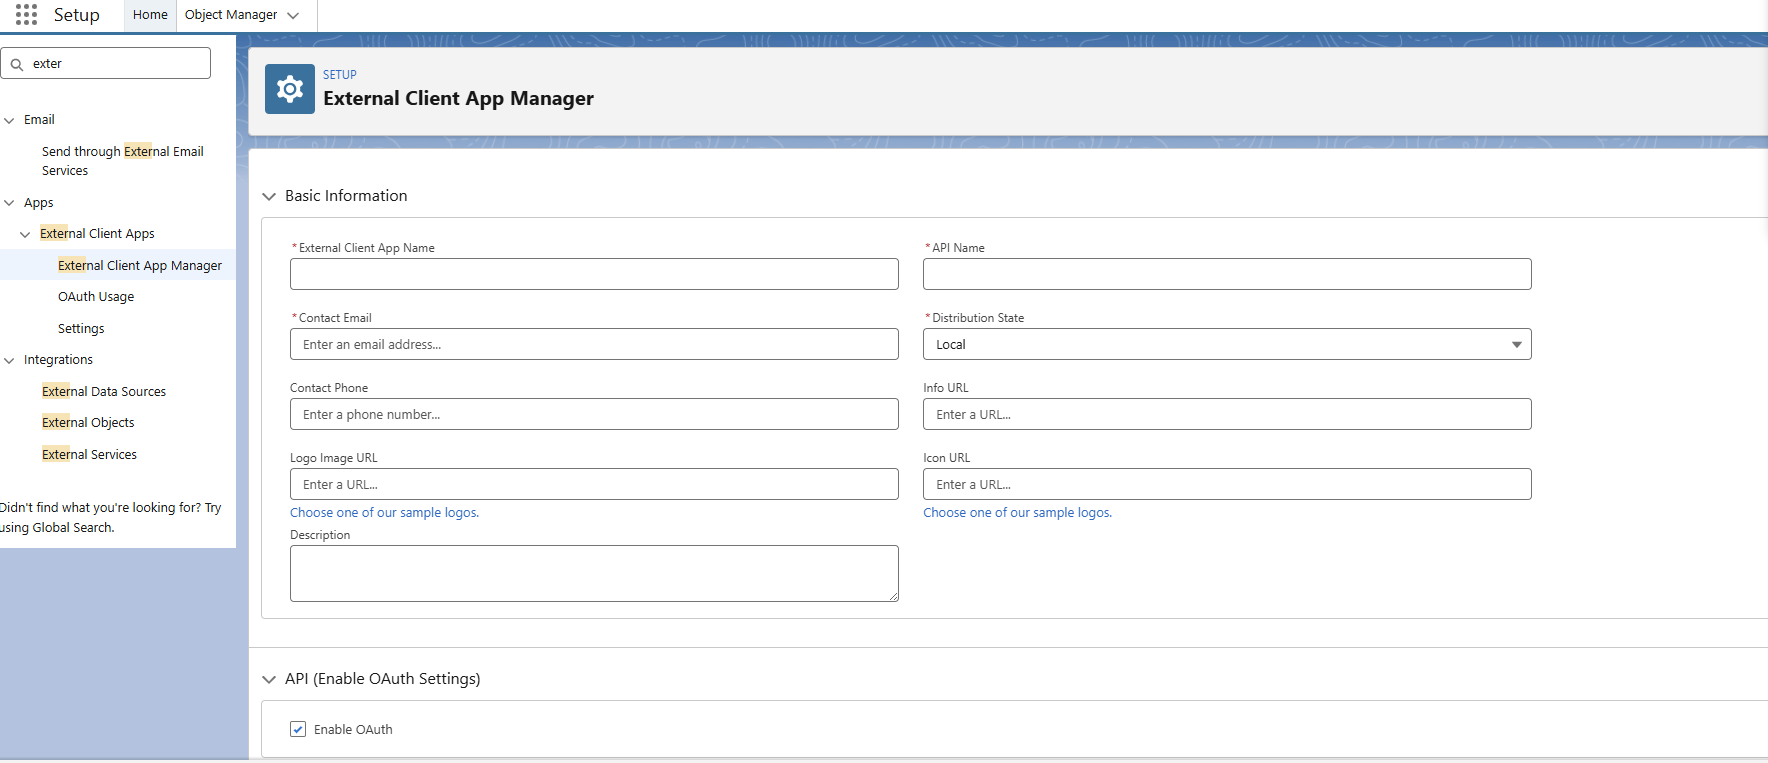
Navigate to the search bar and type External Client App Manager and then click on New External Client App
-
Fill the fields in Basic Information Section
-
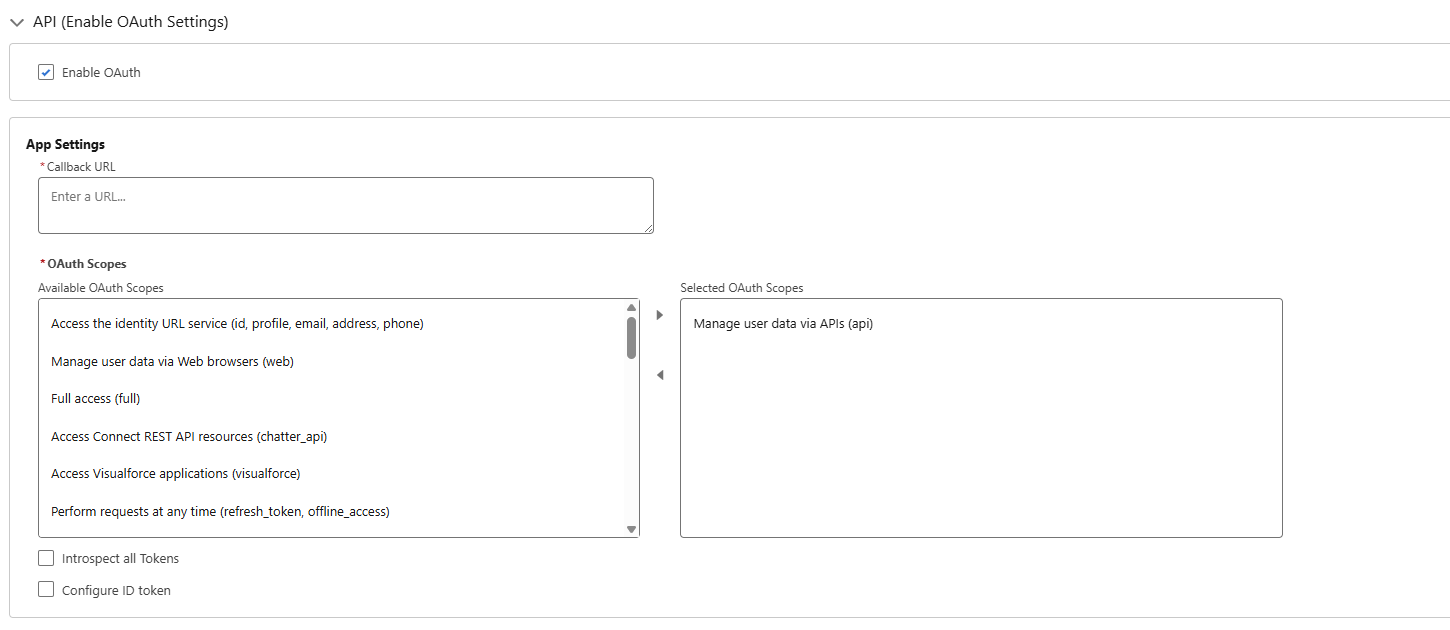
Under OAuth Settings, select enable OAuth, fill the callback url, then in the OAuth Scopes select Manage user data via APIs (api) and click on the small right arrow to move it to selected scopes.
-
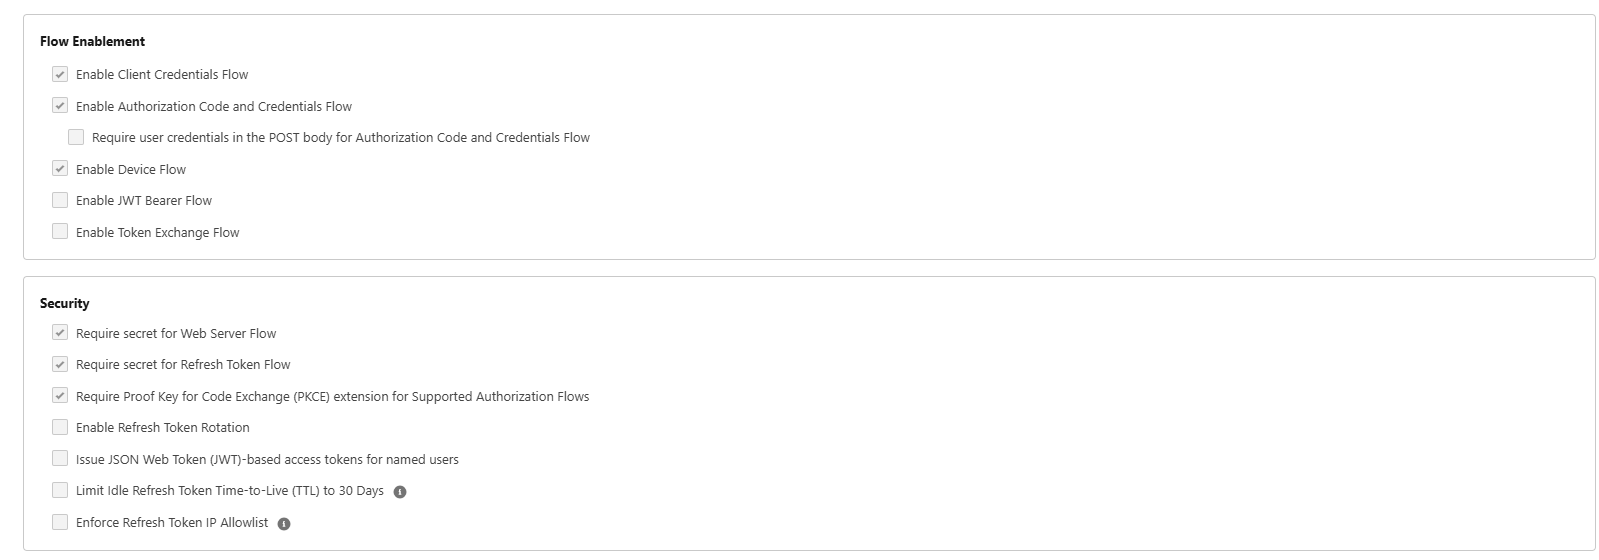
Next in the flow enablement select Enable Client Credentials Flow, Enable Authorization Code and Credentials Flow, Enable Device Flow.
In the security tab select Require secret for Web Server Flow, Require secret for Refresh Token Flow, Require Proof Key for Code Exchange (PKCE) extension for Supported Authorization Flows.
-
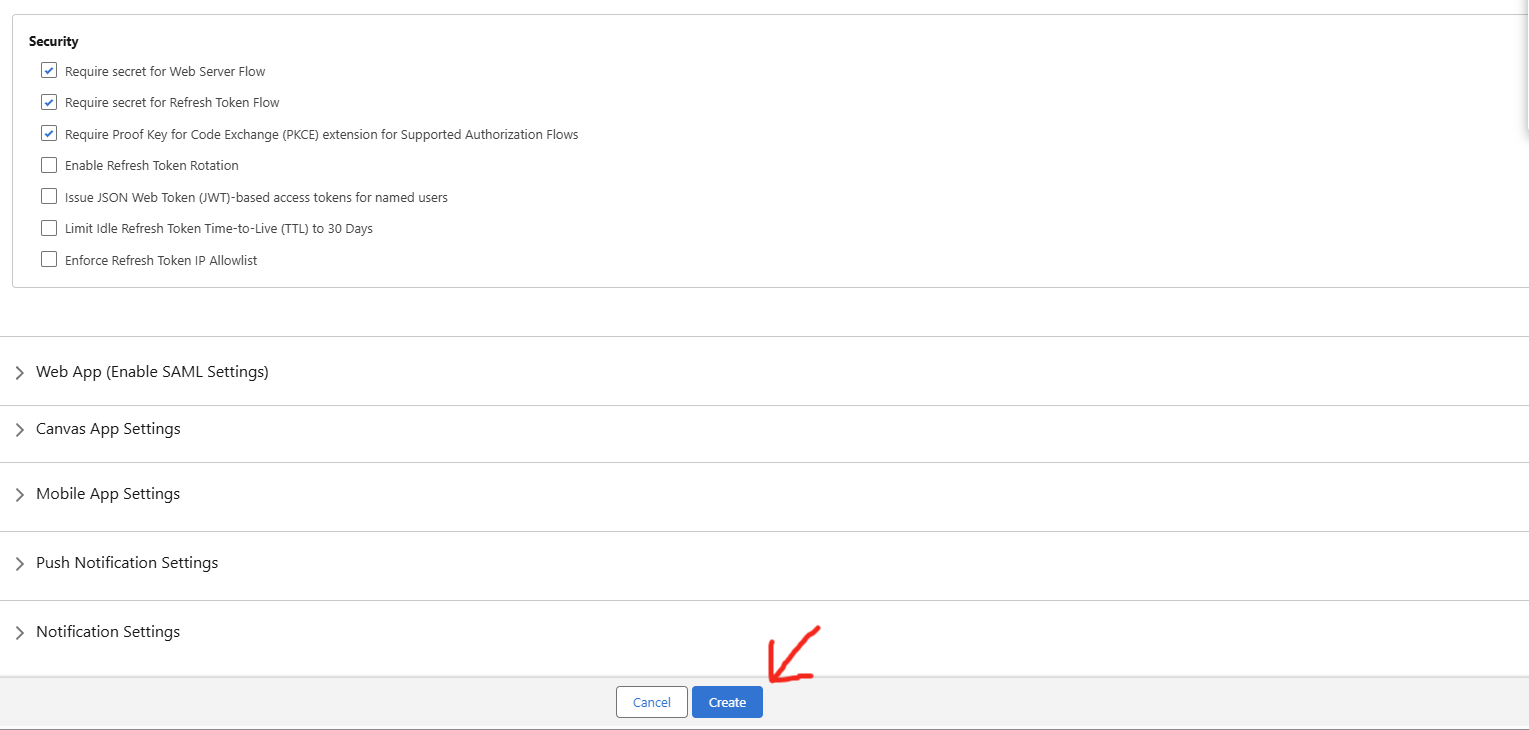
Click Create
-
Select the newly created External client app and click on settings.
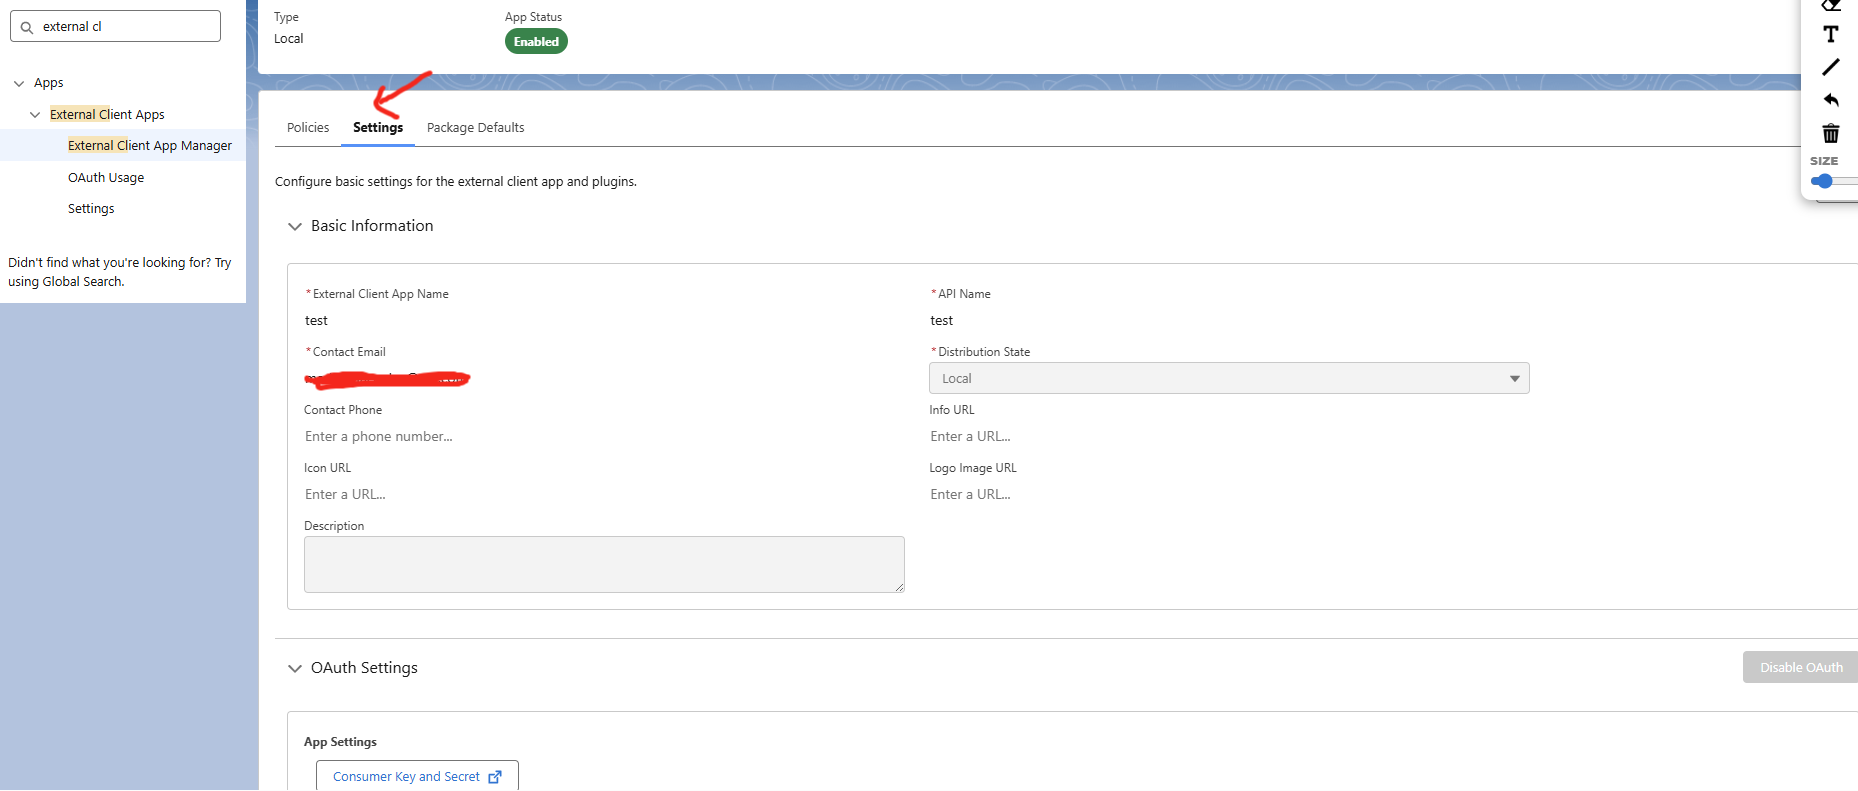
-
Scroll down to OAuth Settings and click Consumer Key and Secret.
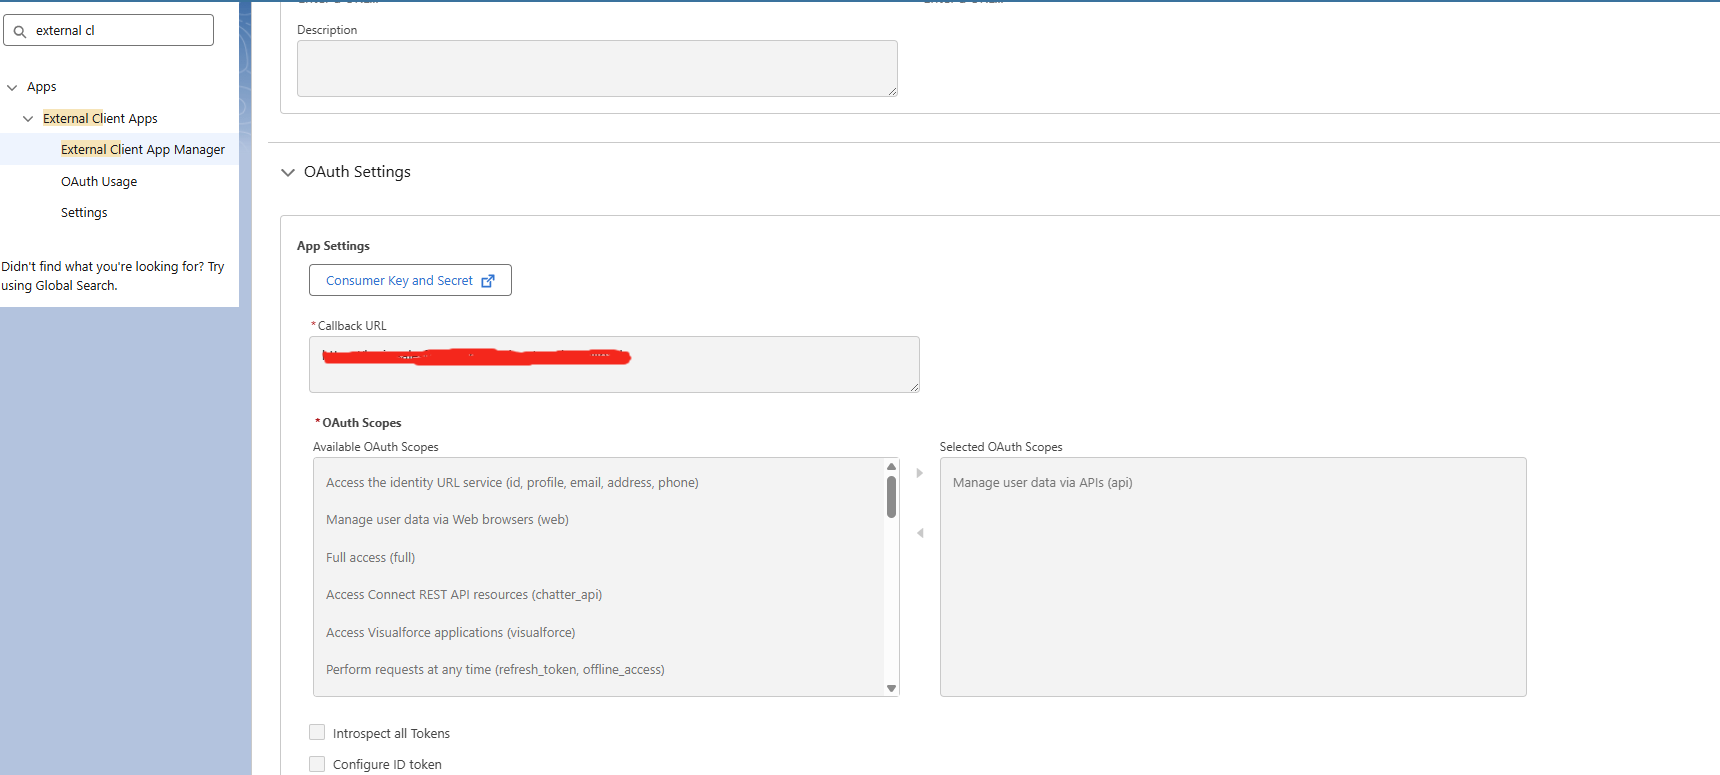
-
Verify your identity by typing the verification code sent to your email and click verify.
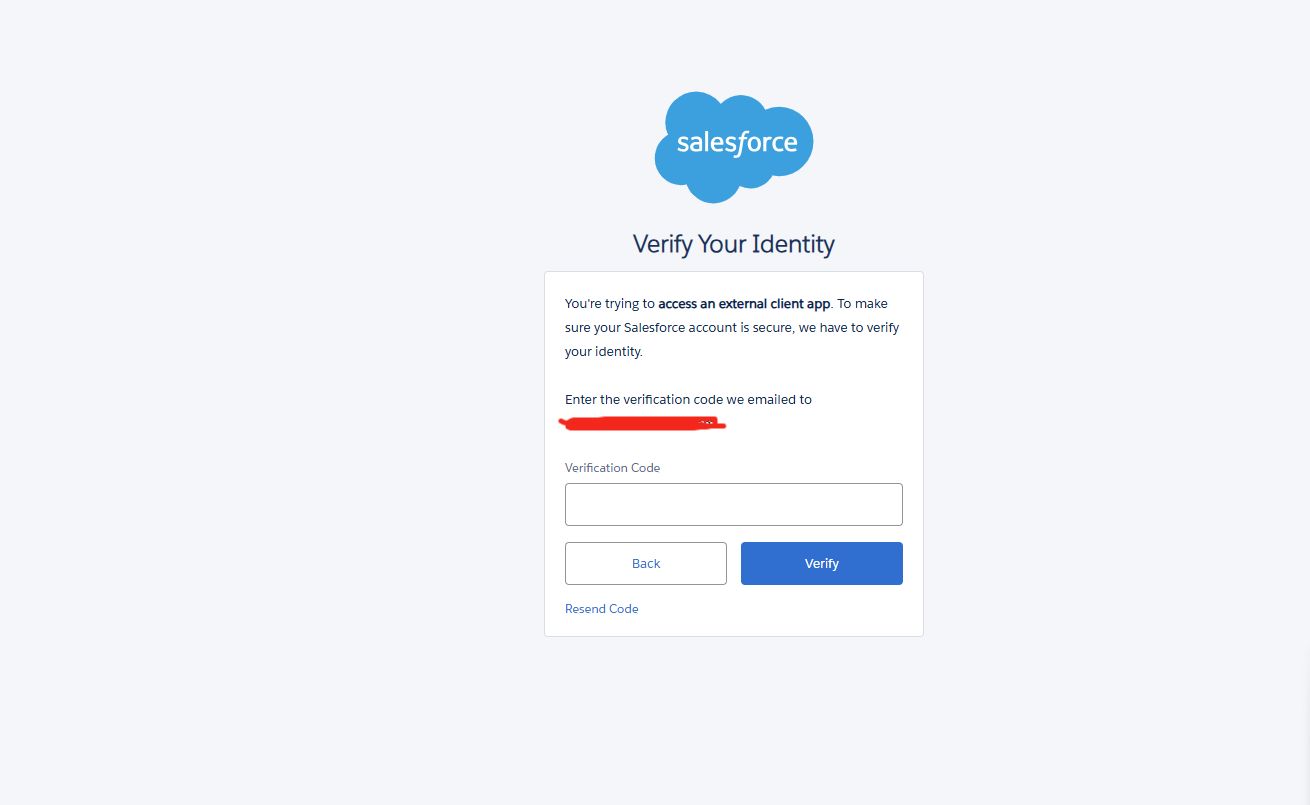
-
Note down the Consumer Key and Consumer Secret.
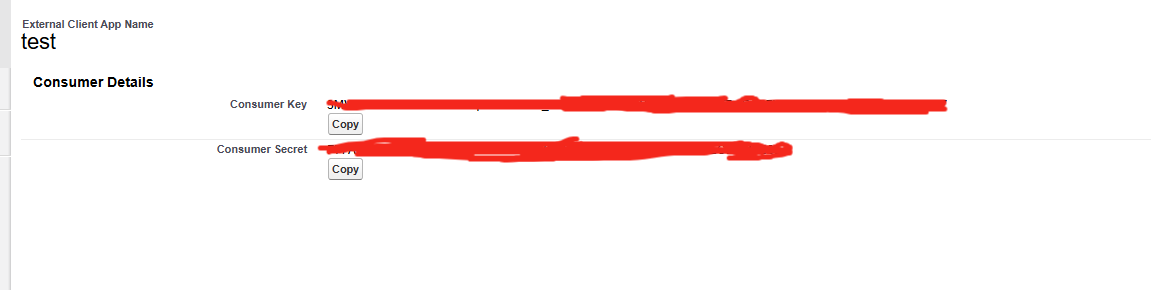
4. List of Data to Handover
Here is the list of all the data to handover to the delivery team.
| CM Frontend Attribute | How to Obtain |
|---|---|
| Organization Id | Step 10 — Copy OrganizationId from the Install Code Snippet |
| Organization Domain Url | Step 10 — Copy the Scrt URL and remove -scrt from the domain |
| Organization Scrt Url | Step 10 — Copy Url from the Install Code Snippet |
| Client Id | Step 18 — Copy the Consumer Key from the External Client App |
| Client Secret | Step 18 — Copy the Consumer Secret from the External Client App |
| Deployment Names | Step 10 — Copy DeveloperName from the Install Code Snippet (comma-separated if multiple) |
| Prechat Body Object Name | Salesforce Object Manager — name of the custom object used to store pre-chat form data |
| SessionId Object Name | Salesforce Object Manager — name of the custom object used to store session IDs |
Type or paste something here to turn it into an excerpt.