Customer Setup - MS Dynamics
This guide explains what you, as the customer, need to provide to enable the integration between MS Dynamics Livechat and our platform.
1. Steps to create app in azure
Register a new application
-
Login to your account on https://portal.azure.com

-
Go to App registration
-
Click New registration and fill in the required details:
- Give a name for your application (whatever works for your organization)
- Select Accounts in any organizational directory (Any Microsoft Entra ID tenant - Multitenant) (Recommended)
- Redirect Uri will be optional
The suggested account type is multi-tenant as the app ID and secrets may need to be used outside the organization to integrate with custom channels.
Generate client secret
- After creating the app, go back to App registration
- Under All applications, find your newly created app and click on it
- Go to Certificates & secrets under Manage
- Under Client secrets, create a new client secret with your desired description
- Copy the Value displayed after creation (you'll need this for the next step and it won't be shown again)
2. Steps to create custom channel in dynamics 365
Access Messaging Accounts
-
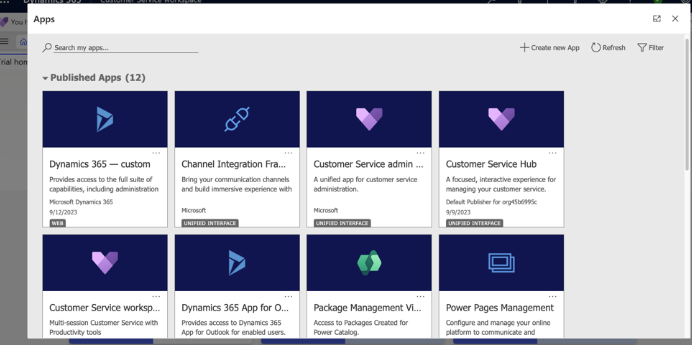
Login to your Dynamics 365 organization account
-
Go to Apps > Customer Service admin center
-
On the left sidebar, go to Channels under Customer support
-
Click Manage under Accounts > Messaging accounts
-
Create a new account
Configure Channel Details
- Enter your preferred name
- Select channel as Custom
Configure Account Details
- Enter the app ID of the app we created in Azure portal (https://portal.azure.com)
- Enter the client secret value we retrieved in https://cmcom.atlassian.net/wiki/spaces/MKT/pages/1534754846/Customer+Setup+-+MS+Dynamics#Generate-client-secret
For more details, see Configure custom messaging channels
Configure Custom Channel
- Enter your preferred name for the channel
- Select channel as Direct line
Save Endpoint URL
After completing the configuration, an endpoint URL will be generated in the next stage. Copy and save this URL – you'll need it in the next step.
3. Steps to create azure bot
Create Bot Resource
-
Go to https://portal.azure.com
-
Click Create a resource
-
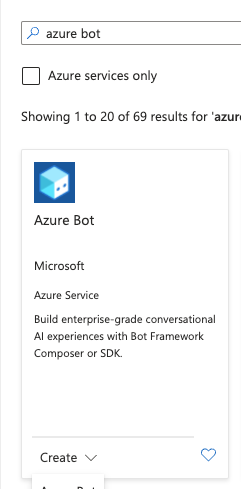
Search for Azure bot and click Create
-
Configure the bot:
- Bot handle: Enter your desired name
- Subscription: Select your subscription
- Resource group: Select or create a resource group
- Data residency: Select according to your needs
- Pricing tier: Select your preferred pricing tier
Configure Microsoft App ID
- Select type of app as Multi Tenant (compulsory)
- Select Use existing app registration for creation type
- Enter the App ID of the app we created in the first section
Configure Messaging Endpoint
- Open the bot you just created
- On the left sidebar, find Configuration under Settings
- Under Messaging endpoint, paste the endpoint URL we received from the Custom Channel setup
Configure Direct Line Channel
-
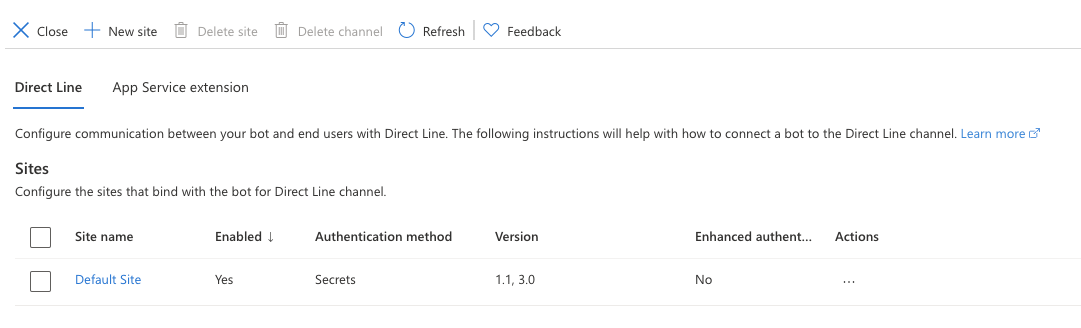
Select Direct Line channel under the Channels section
-
You should see a default site configuration. If not, create a new site
-
Click on the default site and ensure it's enabled
-
Copy one of the two secret keys provided (this will be used as a bearer token for authentication while communicating with agents)
4. Setting up Workstream in Customer Service Admin Center
Create New Workstream
-
Login to your Dynamics 365 dashboard
-
Go to Customer Service admin center app
-
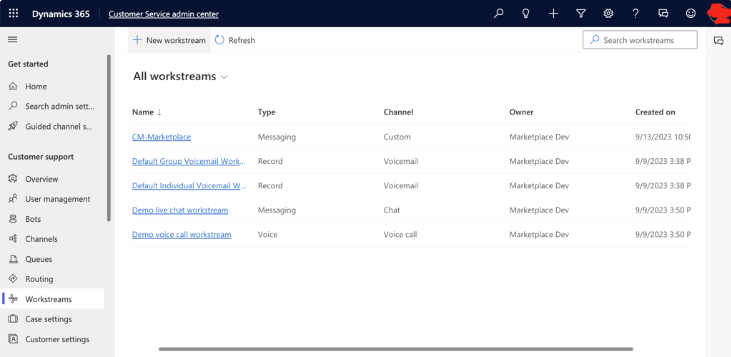
On the left panel, click Workstreams under Customer Support
-
Click New workstream
-
Enter your desired name
-
Workstream type must be Messaging only
Configure Workstream
- Select the workstream you created for the custom channel
- Select Set up Custom
- On the Custom channel page, select the custom messaging account you created earlier
- On the Language page, select the required language
Configure Behaviors
On the Behaviors page, configure the following options:
Messages must be exactly as described in the documentation, or some features might break.
- Trigger: Agent ended conversation
- Message:
endOfConversation
Configure User Features
On the User features page:
- If you want customers or agents (or both) to send file attachments, turn on File attachments and select the appropriate options
Finalize Setup
- Verify the settings on the Summary page
- Click Finish
Additional Configuration
If you have multiple agents and routing configured, make sure to add each agent to the respective Omnichannel from the User Management section of Customer Service admin center.
For a visual guide on setting up the Dynamics side, watch this video:
https://clubmessage.sharepoint.com/✌/r/sites/Marketplace/Shared%20Documents/MSDynamics%20Setup/msdynamics-setup-latest-secrets.mp4?csf=1&web=1&e=HcoAVX
5. Testing DirectLine Token
You can test your DirectLine token using an HTML script provided by the Microsoft team.
Get the Test Script
You can get the code from the Microsoft BotFramework-WebChat GitHub repository or use the script below.
Test Script
Update the YOUR_DIRECTLINE_TOKEN_FROM_AZURE_BOT placeholder with your actual token:
<!DOCTYPE html>
<html>
<head>
    <script crossorigin="anonymous" src="https://cdn.botframework.com/botframework-webchat/latest/webchat.js"></script>
    <style>
        html,
        body {
            height: 100%;
        }
        body {
            margin: 0;
        }
        #webchat {
            height: 100%;
            width: 100%;
        }
    </style>
</head>
<body>
    <div id="webchat" role="main"></div>
    <script>
        window.WebChat.renderWebChat(
            {
                directLine: window.WebChat.createDirectLine({
                    token: 'YOUR_DIRECTLINE_TOKEN_FROM_AZURE_BOT'
                }),
                locale: 'en-US'
            },
            document.getElementById('webchat')
        );
    </script>
</body>
</html>
Next Steps
After completing all the setup steps above, provide the bearer token retrieved from the Create Azure Bot section to the CM Team for integration. Once the integration is complete, you're ready to serve customers.
6. Troubleshooting
Issue with Receiving Notifications for Incoming Messages
If you're facing issues while receiving notifications for incoming messages and you've followed every step carefully, this is likely not a setup issue.
Solution Steps
- Clear site cookies:
- Clear all site cookies
- Hard reload the page
- Log in again and try again
- If the issue persists:
- Get help from Dynamics 365 support
- Test your channel yourself using the official testing guide
Test Your Channel
For testing your own channel, follow the official guide:
Test the custom messaging channel