Delivery Setup
This guide explains how to configure the WooCommerce integration on our platform using the information provided by the customer.
1. Prerequisites
Ensure you have the following details from the customer:
- Store Base URL: The URL of the customer's WooCommerce store.
- Consumer Key
- Consumer Secret
- Confirmation that webhooks have been configured in their WooCommerce store for MSC Customer POST and Order POST Functionality (Optional)
2. Configure the WooCommerce API Integration
Steps to Configure API Access:
- Log in to Marketplace.
- Navigate to the Integrations->CRM section.
- Find the WooCommerce CRM, Click on Create Integration. Give appropriate Integration Name
- Select WooCommerce from the list of available integrations.
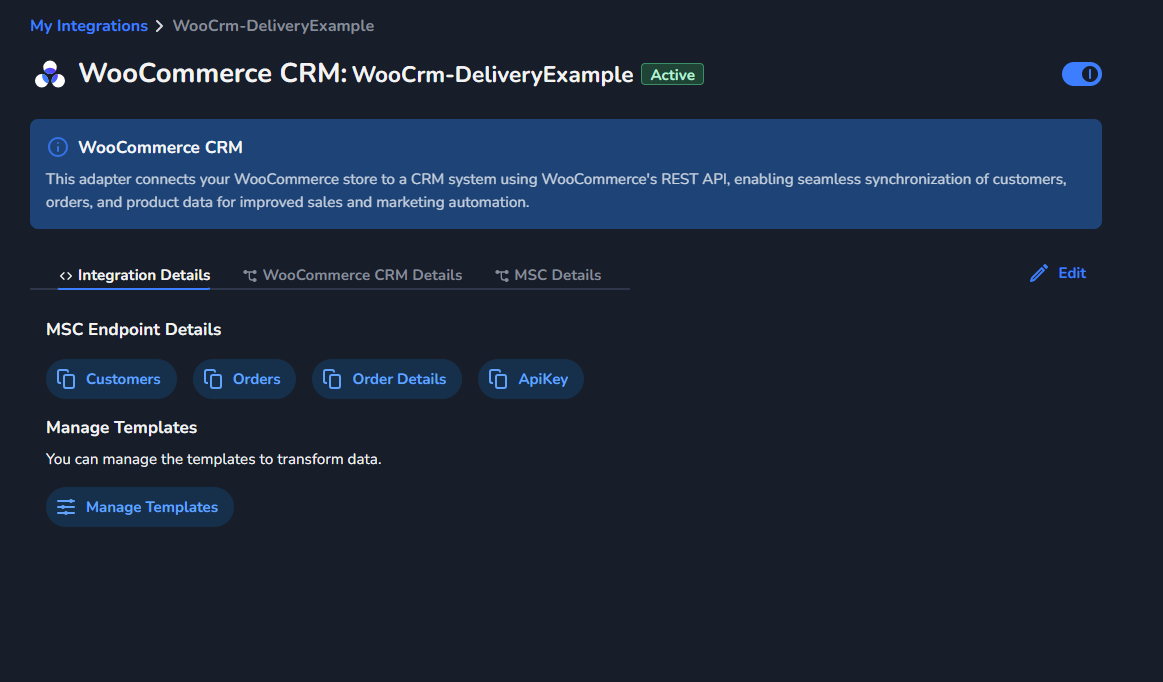
- Enter the following details provided by the customer into the WooCommerce CRM Details:
- Store Base URL: Paste the customer's WooCommerce store URL.
- Consumer Key: Paste the API Consumer Key.
- Consumer Secret: Paste the API Consumer Secret.
- Click Save to establish the connection.
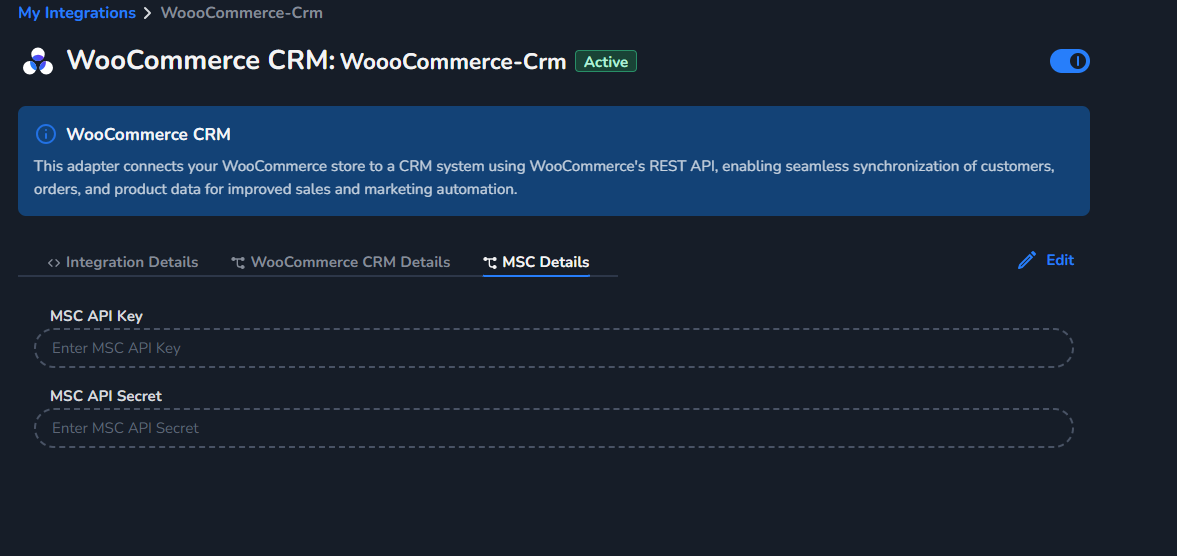
**(OPTIONAL) **To enable the Customer POST and Order POST functionality for WooCommerce, navigate to the MSC Details tab. There, enter the MSC API Key and MSC API Secret.
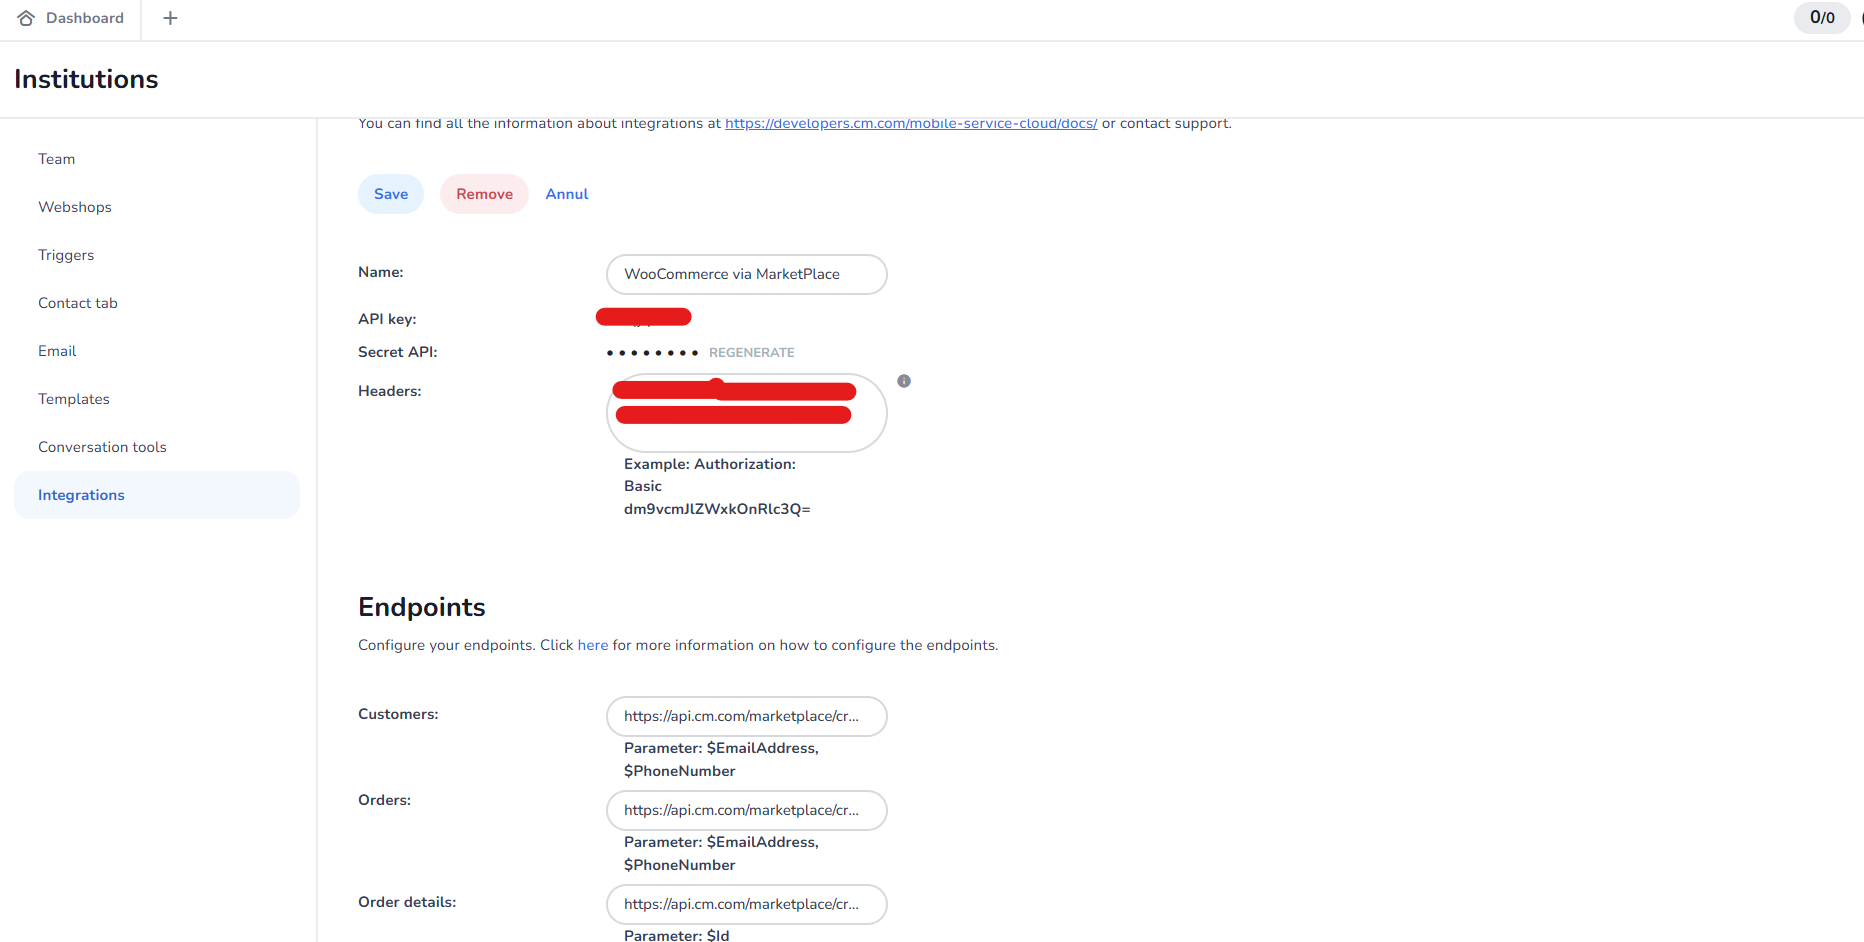
To find the MSC API Key and Secret, log in to the Robin Portal. Then, go to the Integration Details section.
2. Search Functionality in WooCommerce
The search functionality in WooCommerce currently works only with the email field. It cannot include the name or number in the search parameters, as the search operates exclusively based on email.
Note for Delivery Team:
- Ensure that the customer is aware of this limitation.
3. Configure Webhooks
Steps to Verify Webhooks:
- Confirm that the customer has configured the following webhooks in their WooCommerce store:
- Customer Updated Webhook: For customer updates.
- Order Created Webhook: For new orders.
- Order Updated Webhook: For order updates.
- Verify that the Delivery URLs provided by our platform have been correctly added to the webhooks in WooCommerce.
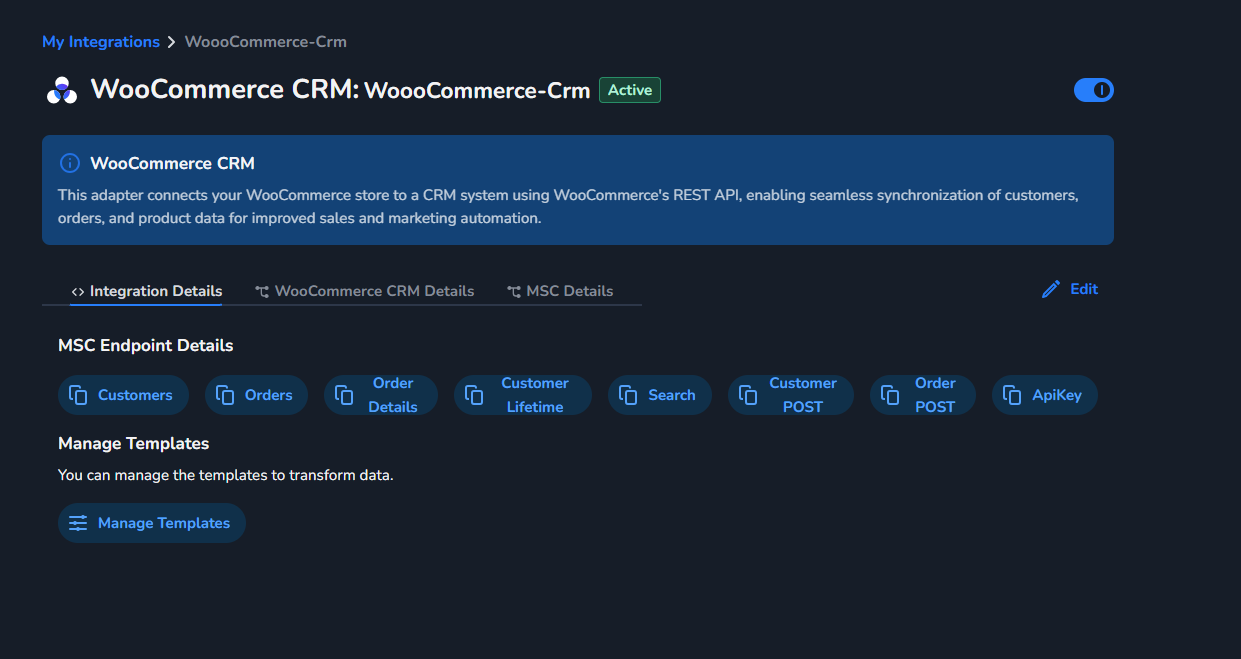
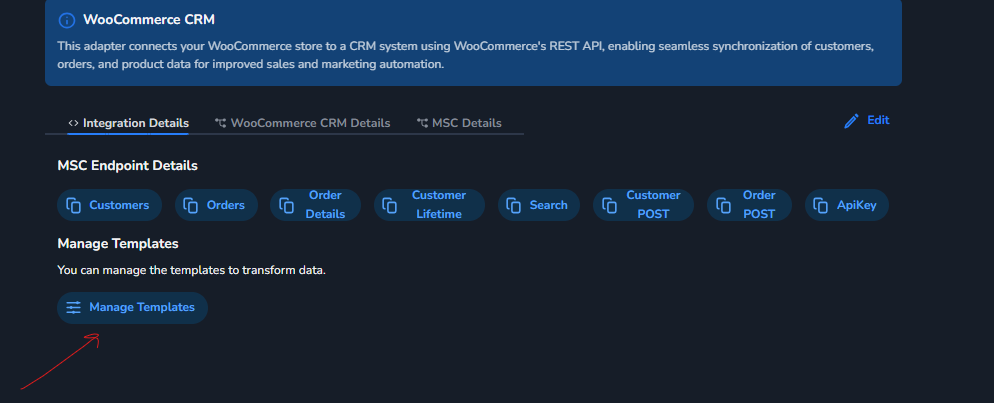
To find the URL, navigate to the Integration Details section of the Marketplace. There, you will see the MSC Endpoint Details. Click on the Customer POST and Order POST options, then share those links with the customer so they can configure them properly.
Api Endpoints of WooCommerce
To retrieve customer and order details from WooCommerce, we use the official WooCommerce REST API endpoints. Below are the details of the endpoints and their usage:
Retrieve Customer Properties by Email Address
To fetch customer details using their email address, we use the WooCommerce REST API endpoint documented in the official WooCommerce API documentation:
- Endpoint: https://woocommerce.github.io/woocommerce-rest-api-docs/?shell#retrieve-a-customer
- Purpose: This endpoint allows us to retrieve the Customer ID and other customer properties by passing the email address as a query parameter.
Retrieve Orders and Order Details
To fetch order details, including order items, status, and other properties, we use the WooCommerce REST API endpoint documented in the official WooCommerce API documentation:
- Endpoint: https://woocommerce.github.io/woocommerce-rest-api-docs/?shell#retrieve-an-order
- Purpose: This endpoint allows us to retrieve order details by passing the Order ID or other relevant parameters.
Example Use Case:
If you need to fetch details of a specific order (e.g., order items, total amount, or shipping details), this endpoint will return the complete order information.
4. Manage Templates (Data Transformation)
The Marketplace lets you customize how WooCommerce data is transformed before it is sent to the MSC endpoints, using templates. Each endpoint ships with a default template that you can override to match a specific customer's requirements.
Steps to Manage Templates:
- Open the WooCommerce CRM integration and go to the Integration Details tab. Under MSC Endpoint Details, find the Manage Templates section and click the Manage Templates button.
- On the Manage Templates page (breadcrumb: My Integrations > WooCommerce-Crm > Manage Templates), click + Add New Template in the top-right corner.

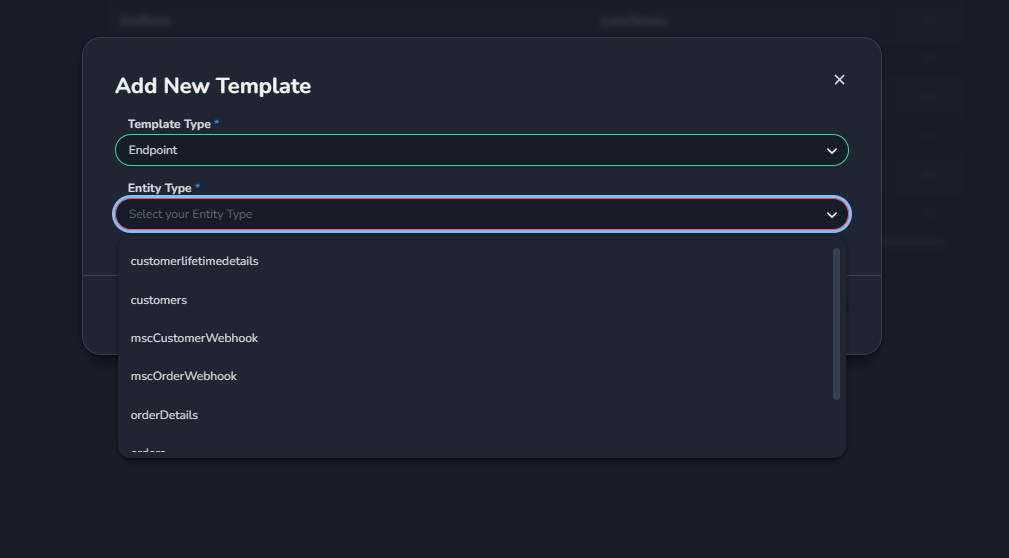
- In the Add New Template dialog, set the Template Type to Endpoint.
- Select the Entity Type / Endpoint you want to customize from the dropdown — for example customers, orders, orderDetails, customerlifetimedetails, mscCustomerWebhook, or mscOrderWebhook.
- The dialog then shows two editors side by side:
-
- Default Template (Reference) — on the left. This is read-only and shows the platform's default transformation for the selected endpoint. Use it as a reference for the available fields and the expected output structure.
- Your Template — on the right. Enter your custom template here and modify the transformation according to the customer's requirements.
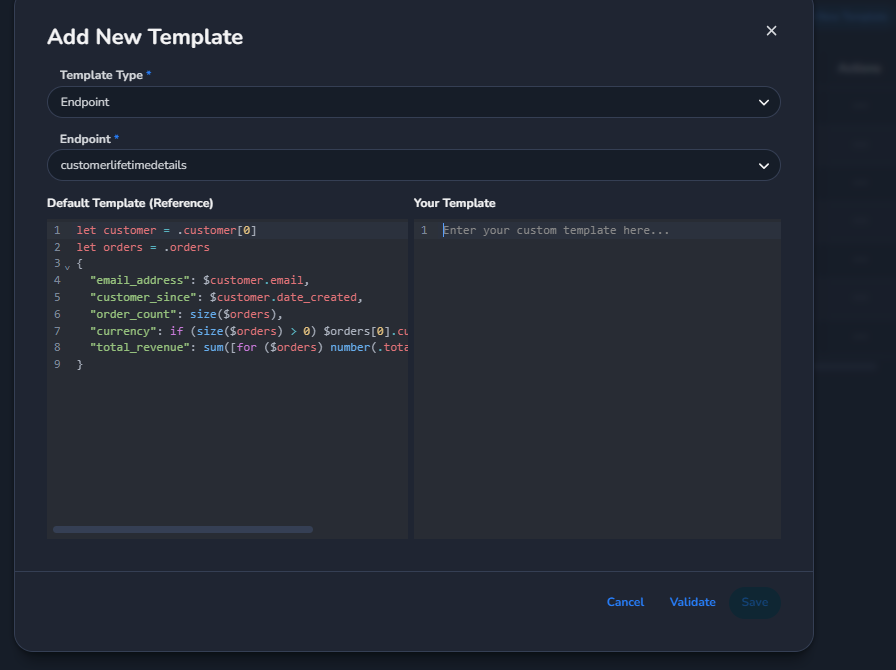
Click Validate to confirm the template syntax is correct, then click Save to apply it.
Tip: Keep the Default Template (Reference) on the left in view while editing it lists the available fields and the expected output shape, so you can match field names and structure in Your Template on the right.