Customer Setup (DRAFT)
DRAFT
This guide explains what you, as the customer, need to do to push your Magento events directly into the CM.com Customer Data Platform (CDP).
1. Prerequisites
Before proceeding, ensure you have:
- Admin access to your Magento store.
- Access to the Magento CLI (Command Line Interface).
- From the CM.com delivery team (see Delivery Setup Magento): your Tenant ID, one or more Event Type IDs, a Product Token, and the field list each Event Type expects.
2. Install Mageplaza Webhook Extension
To enable webhooks in Magento, install the Mageplaza Webhook extension.
Install Free Version of Mageplaza Extension
Refer to the GitHub repo for a brief explanation: Magento2Webhook
- Open your terminal, go to your root application folder, and install the extension.
- To install the Mageplaza webhook extension:
composer require mageplaza/module-webhook
- This will ask you for a username and password.
- Go to the Access Keys page and create a new Access Key.
- It should look something like this:
 Public Key: c7afxxxxxxxxxxxxxxxxxxxxxxxxxxxx
 Private Key: 1bfbxxxxxxxxxxxxxxxxxxxxxxxxxxxx
a) Public Key is the username
b) Private Key is the password
6. Once installation is done, run the upgrade:
php bin/magento setup:upgrade
- Compile:
php bin/magento setup:di:compile
- Deploy static content:
php bin/magento setup:static-content:deploy
Install Paid Version of Mageplaza Extension
- Log in to your Magento Admin Dashboard.
- Go to Visit Magento Marketplace, open Extensions from the navbar, and search for mageplaza-module-webhook.
- Purchase and install the extension.
- Refresh your Magento dashboard, log out, and log back in. You will now see the Webhooks option under System > Webhook > Manage Hooks.
[SCREENSHOT PLACEHOLDER — Magento Marketplace extension search / install screens, same as the current live page.]
4. Configure Mageplaza Webhook Events to CDP Through Marketplace
Steps to Configure Webhooks
-
Navigate to System > Webhook > Manage Hooks in your Magento Admin Dashboard.
-
Create a New Webhook Event that will trigger the CDP:
- Click Add New Button or Add New Button Sidebar.
- Suppose we are sending the event for whenever new customer is created. Click on the New Customer option from Add new sidebar
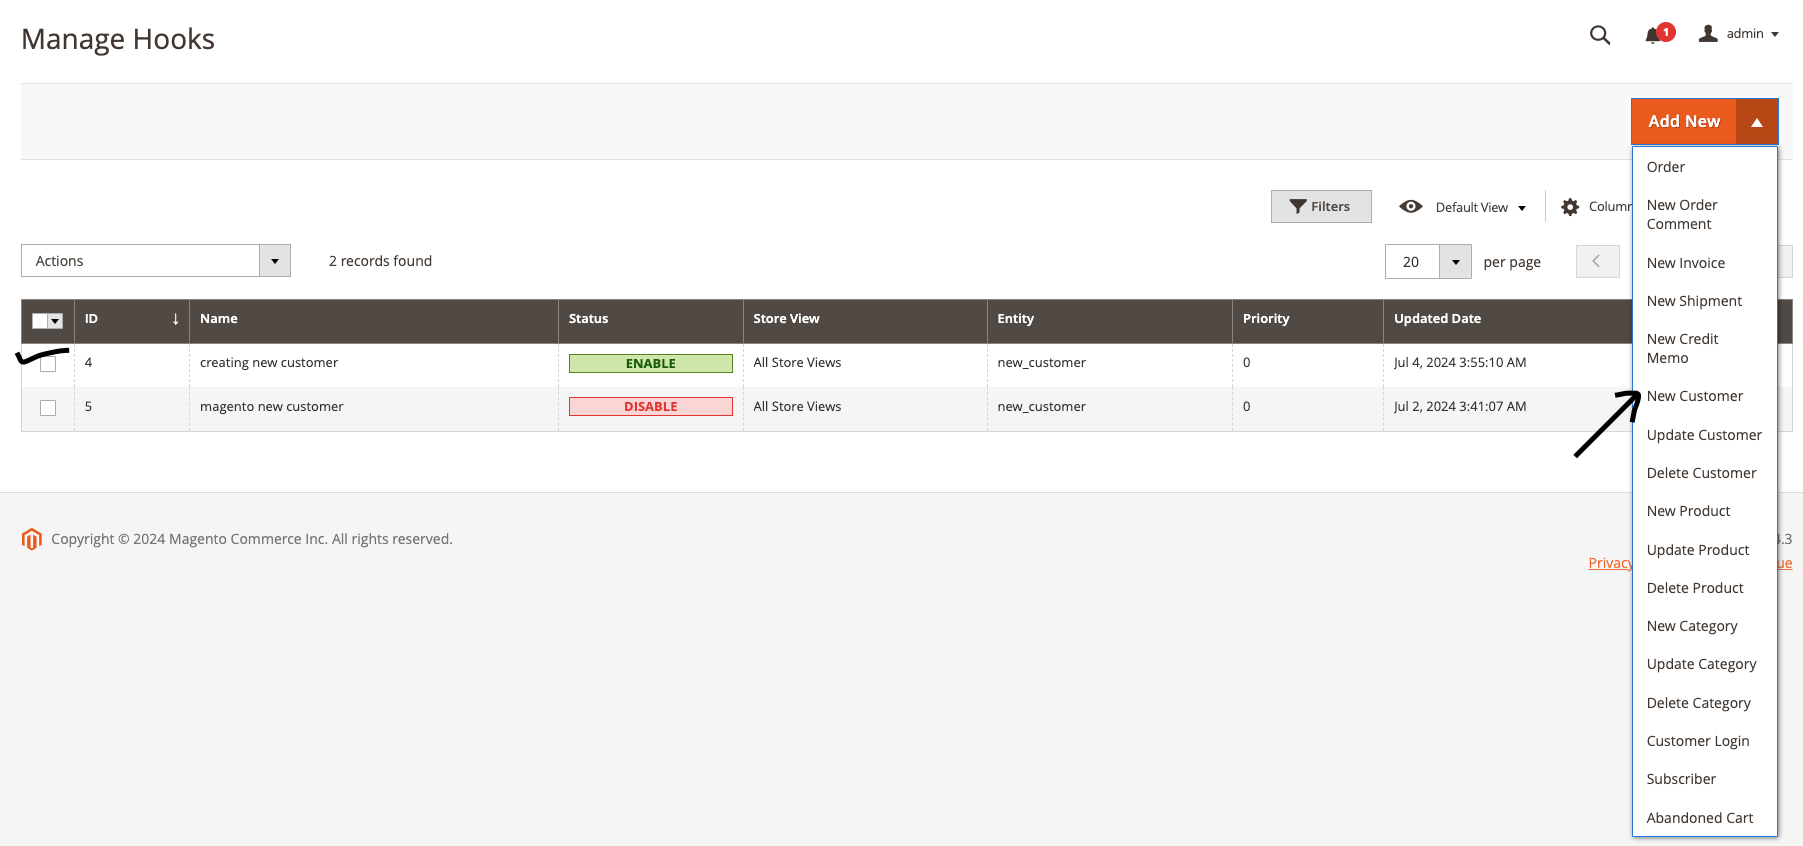
- Give a suitable Name for it and Enable the status from the drop down
- In Store Views select the option which you want to provide if you want all store should view select All Store Views
- In next section Give Priority 0 to it as it is the highest priority
- Then Go to **Actions **Tab Give the Payload URL as when you are registering a webhook you must provide the details
- Payload URL:
<https://api.cm.com/marketplace/crm/v1/tenants/{tenant_id}/adapters/{adapter_id}/events>
- In Header Pass the authorization Api key for the authentication
Authorization: Bearer <API_KEY>
- For Content Type Select application/json; charset=UTF-8 and in Body pass the payload that you need to provide in the json format and pass a field there with "EntityType": "Customer Added" that will show in the CDP events.
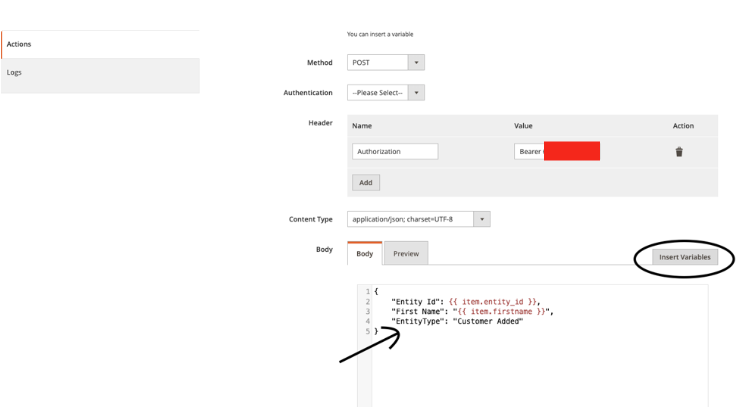
- Then Press the Save button and save the webhook configuration
- Go to Magento Dashboard and then go to Customers and Create new customers fill all the necessary details and click on Save Customers, it will trigger the webhook event that we created in mageplaza and you can see that event in the CDP
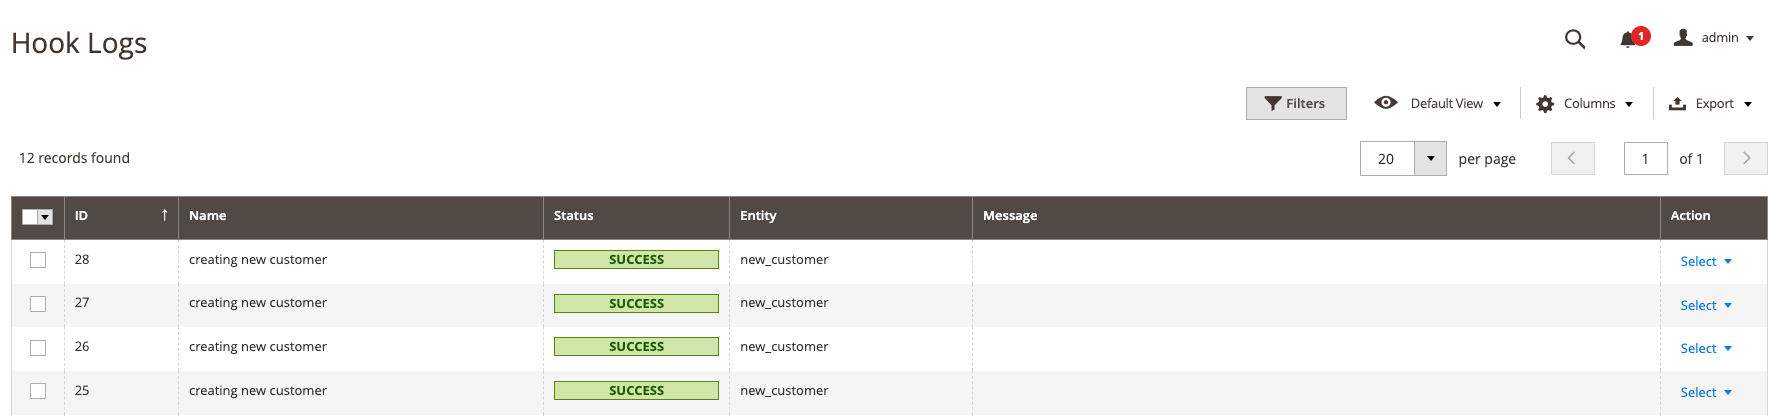
- Check Logs: To Check Logs whether the event to CDP is success or not Go to System > Webhook > Logs then you can check the logs.
4. Retrieve OAuth Credentials
To enable API access, you need to configure OAuth settings and create an integration in Magento.
Configure OAuth Settings
- Navigate to Stores > Configuration > Services > OAuth.
- Set Customer Token Lifetime (hours) to a higher value (e.g., 400-500 hours).
Create a New Integration
- Navigate to the Integrations Page:
- From the admin sidebar, go to System > Integrations.
- Add a New Integration:
- Click on the Add New Integration button.
- Configure Integration Details:
- Name: Enter a name for the integration (e.g., MyIntegration).
- API:
- Under the API section, you will define the resources this integration can access.
- To grant access to all resources, change Resource Access from Custom to All.
- Set Integration Info:
- Go back to the Integration Info tab.
- Enter your admin password in the Your Password field.
- Save the Integration:
- Click the Save button.
- Activate the Integration:
- After saving, you'll see the Activate button under your newly created integration.
- Click Activate and then Allow to grant access to the requested resources.
- Copy the Credentials:
- Once the integration is activated, you will see four credentials:
- Consumer Key
- Consumer Secret
- Access Token
- Access Token Secret
- Copy these credentials and save them securely.
- Once the integration is activated, you will see four credentials:
5. Share Details with the Delivery Team
Once you have the following details, share them with the delivery team:
- Resource URL
- Consumer Key
- Consumer Secret
- Access Token
- Access Token Secret