Delivery Setup SharePoint
Delivery Setup
This guide explains how to configure the SharePoint integration on our platform using the information provided by the customer. The CM Marketplace SharePoint integration app is registered for API access only (to read SharePoint content via Microsoft Graph API) it is not designed for single sign-on.
1. Prerequisites
Ensure you have the following details from the customer:
- Base URL
- Tenant ID
- Access Mode
2. Configure the SharePoint CMS Integration
Steps to Configure API Access:
- Log in to the Marketplace platform.
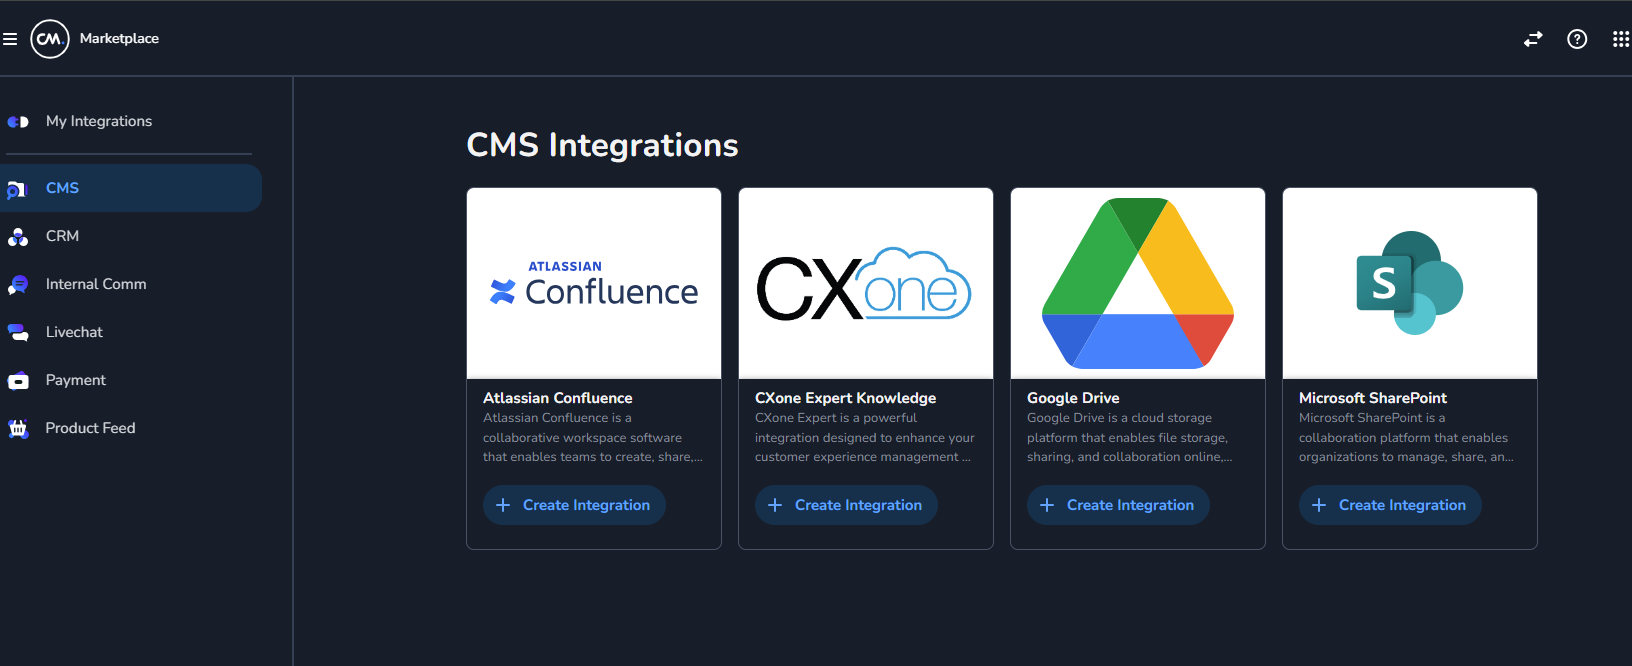
- Navigate to the CMS section in the left panel and select Microsoft SharePoint.
-
Click on Create Integration and provide a descriptive name (e.g., "SharePoint CMS Integration").
-
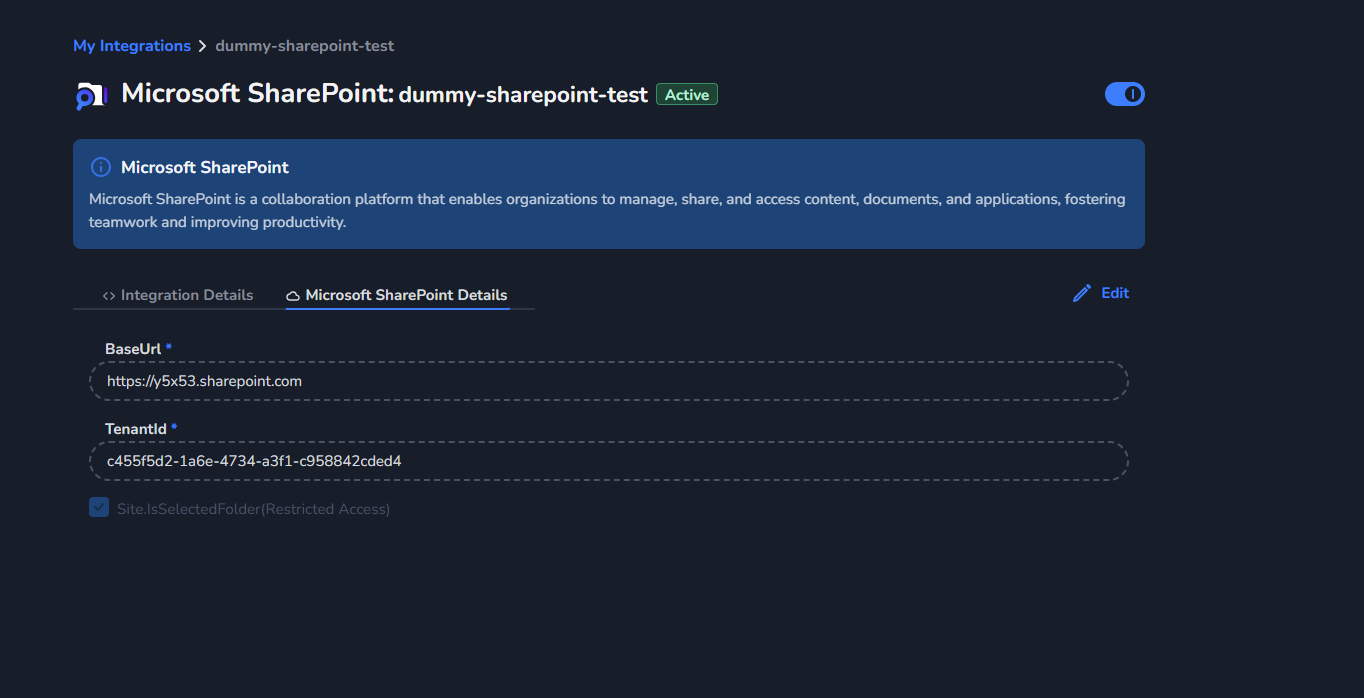
Enter the following details:
- Base URL: Paste the Base URL provided by the customer.
- Tenant ID: Paste the Tenant ID provided by the customer.
- Access Mode:
- Leave the checkbox unchecked for Sites.ReadAll (default - broad access to all sites)
- Check the checkbox for Selected Folder (restricted access to specific folders only)
Note: The access mode should match the customer's requirements as specified in their setup documentation.
- Save the integration to establish the connection.
3. Provide Application Client ID to Customer (For Selected Folder Mode)
This step is required only if the customer has chosen Selected Folder (restricted access) mode.
After creating the integration in the Marketplace platform, you must provide the Application (Client) ID to the customer so they can complete the folder-level permission grant process.
cd6a4328-4a40-4ce6-b6d5-ce0617c3d15a
Pull Data from SharePoint
To retrieve content from SharePoint, make an HTTP POST request to the /contents endpoint of the Marketplace API with a request body containing the SharePoint site name and the file or folder name you want to pull.
Access Mode Differences
For Sites.ReadAll (Default):
- You can pull data from any site, file, or folder within the customer's SharePoint tenant.
For Selected Folder (Restricted):
- You can only pull data from the specific sites that the customer has explicitly granted permission to during the setup process.
- The
siteparameter in the request must match one of the authorized site names. - The
fileorfolderpath in the request must be within the folders that have been granted permission.
Note: If you specify a folder name in the request, all content from that folder will be retrieved.
Example Request Body
{
  "site": "Marketplace",
  "file": "ENGAGE 38 - Agentic AI 1.pdf"
}
Or for a folder:
{
  "site": "Marketplace",
  "folder": "Documents"
}
Site Name: The Site Name is the path segment after /sites/ in your SharePoint URL. Example: If your site URL is https://yourdomain.sharepoint.com/sites/MarketingTeam, the Site Name is MarketingTeam.
Important: The integration only works with SharePoint subsites (URLs containing /sites/{SiteName}). Content on the root site (https://yourdomain.sharepoint.com) cannot be accessed directly. If your content is on the root site, please move it to a subsite.
File Name: Can be a file name, folder name, or a folder path (e.g., Chip/Knowledge). Content is searched within the default document library of the specified site.
Example cURL Request
curl -L 'https://api.cm.com/marketplace/cms/v1/tenants/1f65ff84-d302-4edd-8fd6-d1d70e11856b/adapters/a134eabe-6861-41af-ad99-bc8807176365/contents?apiKey=YOUR_API_KEY' \
-H 'accept: */*' \
-H 'Content-Type: application/json' \
-d '{
  "site": "Marketplace",
  "file": "ENGAGE 38 - Agentic AI 1.pdf"
}'
Example Response
The response contains an attachmentFiles field with signed URLs for objects stored in the Google Cloud bucket. These URLs are valid for 1 hour.
[
    {
        "id": "014SHRLYACAYMDYDXVVZBLYBYDNUU676JQ",
        "title": "ENGAGE 38 - Agentic AI 1.pdf",
        "content": null,
        "path": "https://graph.microsoft.com/v1.0/drives/b!Bonc9cxF-0myB-Z5Itw3EViOszrYDmlNvQkp-ozmcGd8lfjpZTNzSKIxlrJvItDZ/items/014SHRLYACAYMDYDXVVZBLYBYDNUU676JQ/content",
        "attachmentFiles": [
            {
                "name": "ENGAGE 38 - Agentic AI 1.pdf",
                "url": "https://storage.googleapis.com/cm-marketplace-cms-bucket-prod/1f65ff84-d302-4edd-8fd6-d1d70e11856b/a134eabe-6861-41af-ad99-bc8807176365/sharepoint/attachments/ENGAGE%2038%20-%20Agentic%20AI%201.pdf?signed-here",
                "fileType": "pdf"
            }
        ],
        "metaData": null
    }
]
7. Integrating SharePoint Data into Halo
To integrate the SharePoint CMS data into the Halo product, follow these steps:
Steps to Integrate with Halo:
- Log in to the Halo platform.
- Navigate to the Sidebar and find the Knowledge section.
- Click on the Plus (+) icon in the dropdown menu.
- Select Add Marketplace from the options.
- Provide an appropriate name for the integration (e.g., "SharePoint Knowledge Base").
- Choose the Integration Type that you created in the Marketplace platform.
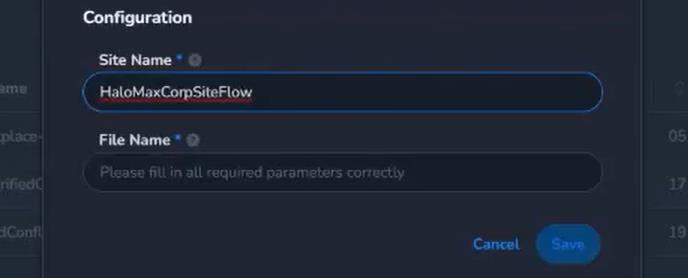
- Enter the configuration details:
- SiteName: Specify the SharePoint site name.
- FileName: Specify the FileName or FolderName
SiteName: The path segment after /sites/ in your SharePoint URL (e.g., MarketingTeam, not the full URL). Must be a subsite, not the root site. FileName: The file name, folder name, or folder path you want to sync (e.g., Chip/Knowledge).
- Click Save to create the integration.
Important: The Site Name should contain only the site name from the URL path (e.g., maxcorp), not the full URL. You can find it in your SharePoint URL: https://yourdomain.sharepoint.com/sites/maxcorp → Site Name is maxcorp.
Syncing Data:
- After creating the integration, trigger a sync to fetch the SharePoint data.
- You can sync specific files, folders, or both, based on your requirements.
- Important: For Selected Folder mode, ensure that all specified folders have been granted permission during the initial setup. If a folder has not been authorized, the sync will fail for that folder.