Clusters
A cluster is a group of departments that you create yourself. For example, you can group all support departments into one cluster. You can then look at them together instead of picking each department one by one.
You manage clusters on the Clusters page. Select Clusters in the menu to open it.
What it does
- Lists all the clusters of your account
- Lets you create a cluster and choose which departments belong to it
- Lets you change a cluster's name, description and departments, and delete it
Where you can use a cluster
Once you have created a cluster, you can choose it in these places:
- On the Dashboard, to see the departments that belong to that cluster
See your clusters
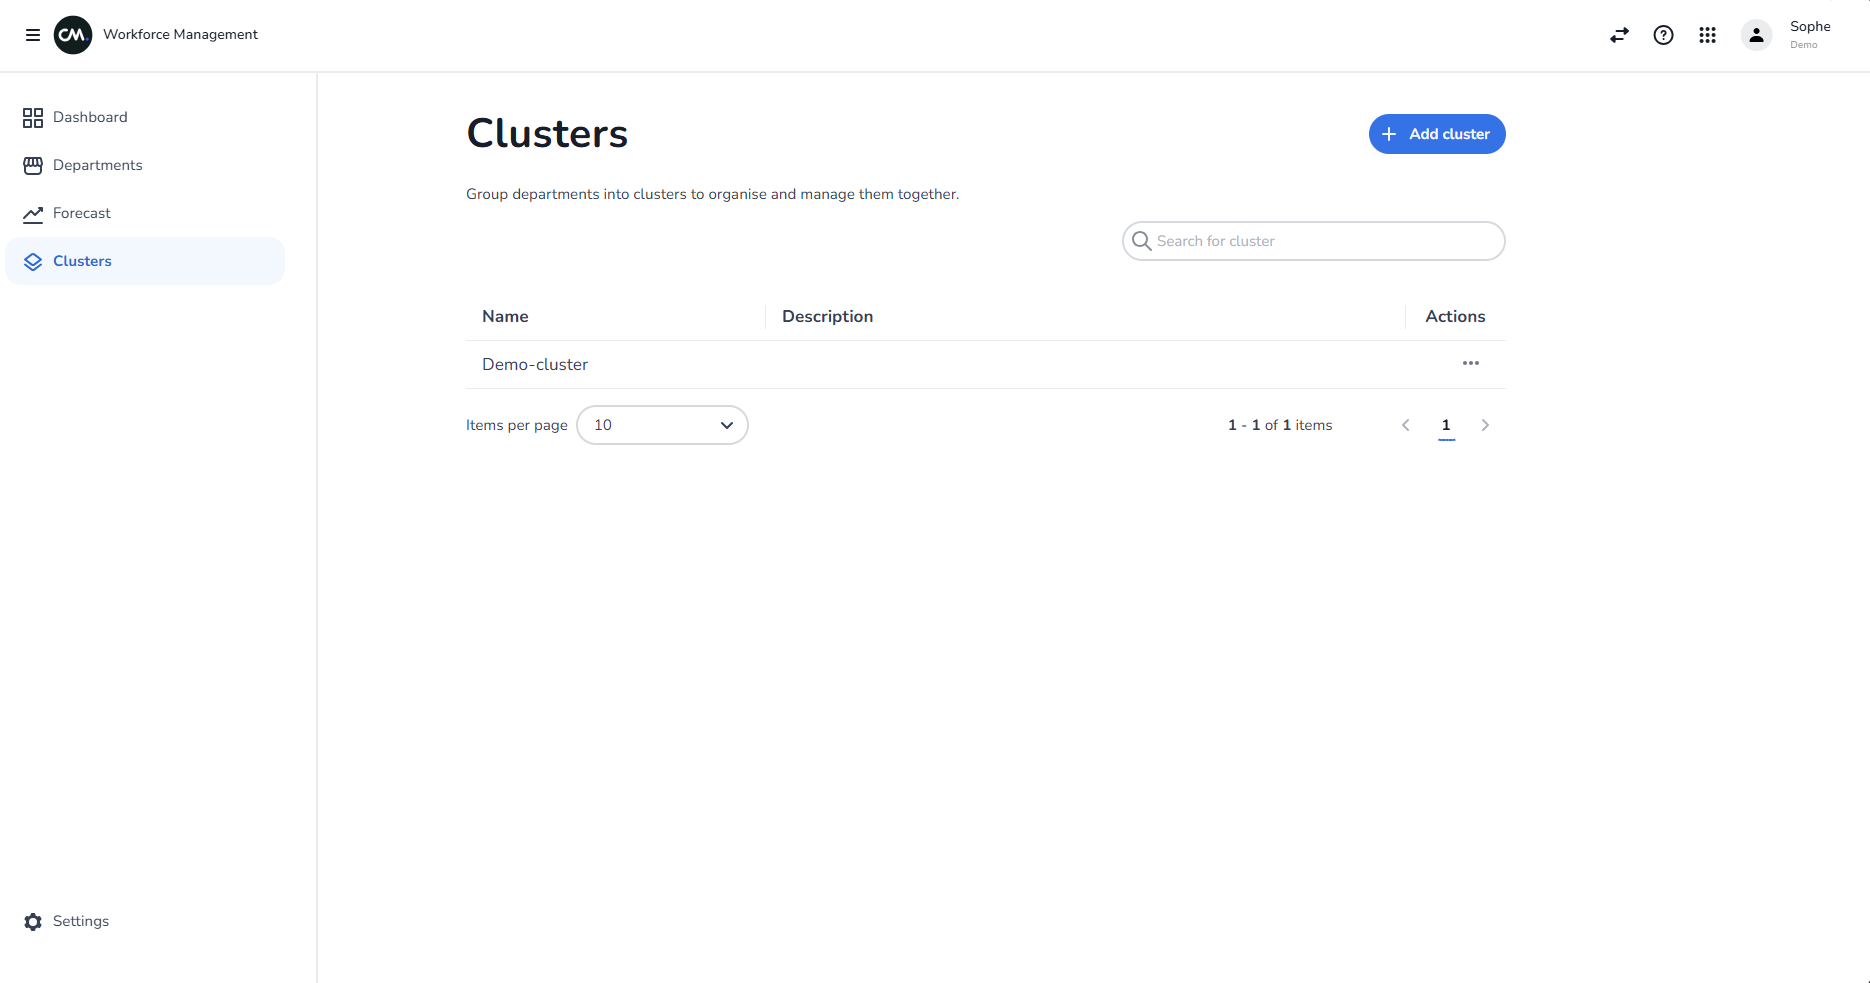
The page title is Clusters. Under it, a line explains that you can group departments into clusters to organise and manage them together.
The clusters are shown in a table with these columns:
| Column | What it shows |
|---|---|
| Name | The name of the cluster |
| Description | The description you gave the cluster |
| Actions | A menu with Edit and Delete |
The list shows 10 clusters per page. Use the page controls at the bottom to move between pages or to change the number per page.
To find a cluster, type in Search for cluster. The search looks at the name and the description of the clusters on the page you are looking at. If you have more than one page, go to the right page first.
If there are no clusters yet, the page says No clusters to display and asks you to add a cluster to get started.
Create a cluster
- Select Add cluster at the top of the Clusters page. A new page opens with the title Create new cluster.
- Type a Name. The name is required, and Save stays unavailable until you have filled it in.
- Optionally, type a Description to explain what the cluster is for.
- Under the description, choose the departments that belong to the cluster. See the next section.
- Select Save at the top right.
A message confirms that the cluster was created, and you return to the list of clusters.
Select Cancel to leave the page without saving.
Choose the departments
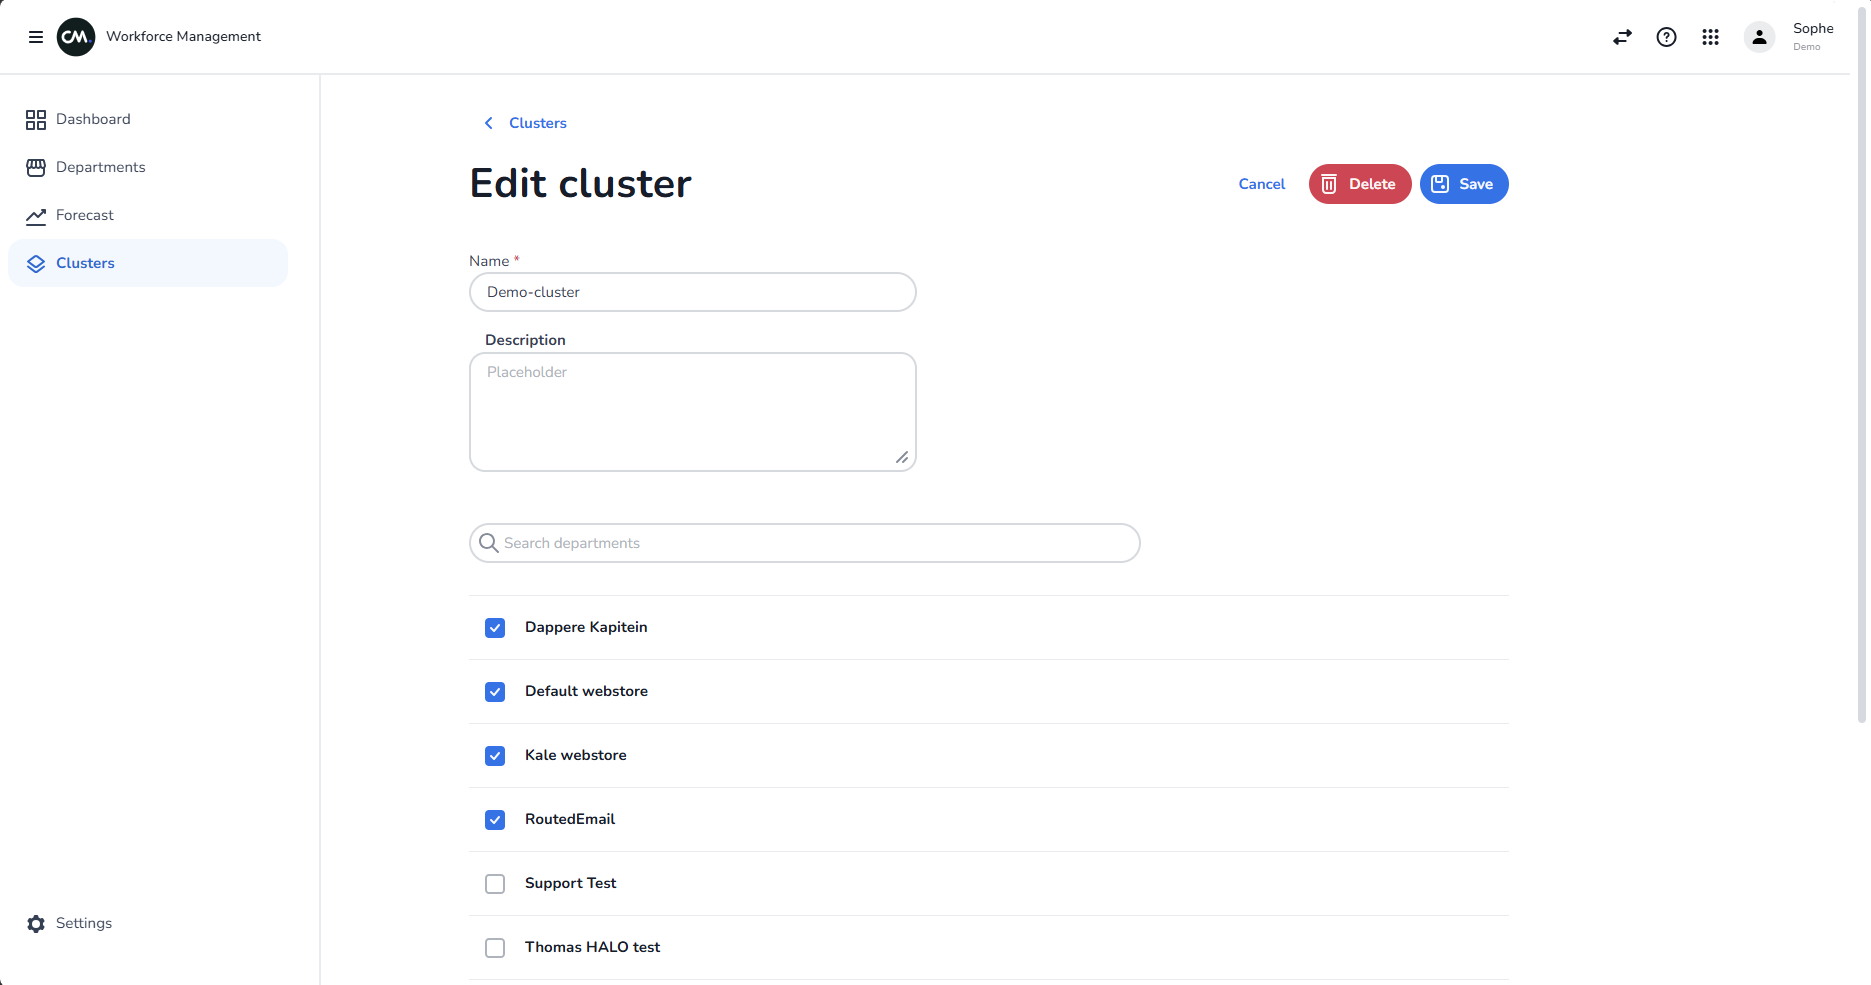
Below the Name and Description, a list of your departments appears. Each department has a checkbox.
- Select the checkbox, or anywhere on the row, to add the department to the cluster. Select it again to remove it.
- Use Search departments to find a department by name.
- The list shows 10 departments per page. Your choices are kept when you go to another page or when you search.
- If no departments match, the list says No departments found.
[IMAGE NEEDED: #9 — The Create new cluster page with the Name and Description fields filled in, the Cancel and Save buttons at the top right, and the list of departments with a few checkboxes ticked and the search box above the list.]
Edit a cluster
- On the Clusters page, select a row, or open the Actions menu on the right of the row and select Edit.
- The Edit cluster page opens with the current name, description and departments.
- Change what you need. You can add departments, remove departments, and change the name and description.
- Select Save.
A message confirms that the cluster was updated, and you return to the list.
Delete a cluster
You can delete a cluster in two ways:
- From the list: open the Actions menu on the right of the row and select Delete.
- From the Edit cluster page: select Delete at the top right.
In both cases, the Delete cluster? window asks you to confirm. Select Delete to confirm, or Cancel to keep the cluster.
Deleting a cluster cannot be undone. The departments in the cluster are not deleted, only the group.
[IMAGE NEEDED: #10 — The Delete cluster? confirmation window, opened from the Actions menu of a row in the cluster table.]
If something goes wrong
If the app cannot load or save, a red message appears, for example Could not create the cluster. Please try again. Try again in a moment. If it keeps happening, contact CM.com support.
Tips
- Name clusters after what the departments have in common, such as a team, a region or a language. Use the description to say what is in it.
- The department list does not show cluster membership, so keep the cluster descriptions up to date.