Overview
A flow defines how messages are routed through the Conversational Router for a given use case (for example, bot-first with handover to an agent). Each flow is composed of one or more states. You design a flow in the editor by connecting channels and applications and configuring states with directional links. When a flow is published, new conversations start in its default state, and you can transition to other states in real time (for example, from bot to agent).
Management
You can manage your flows on the Flows page.
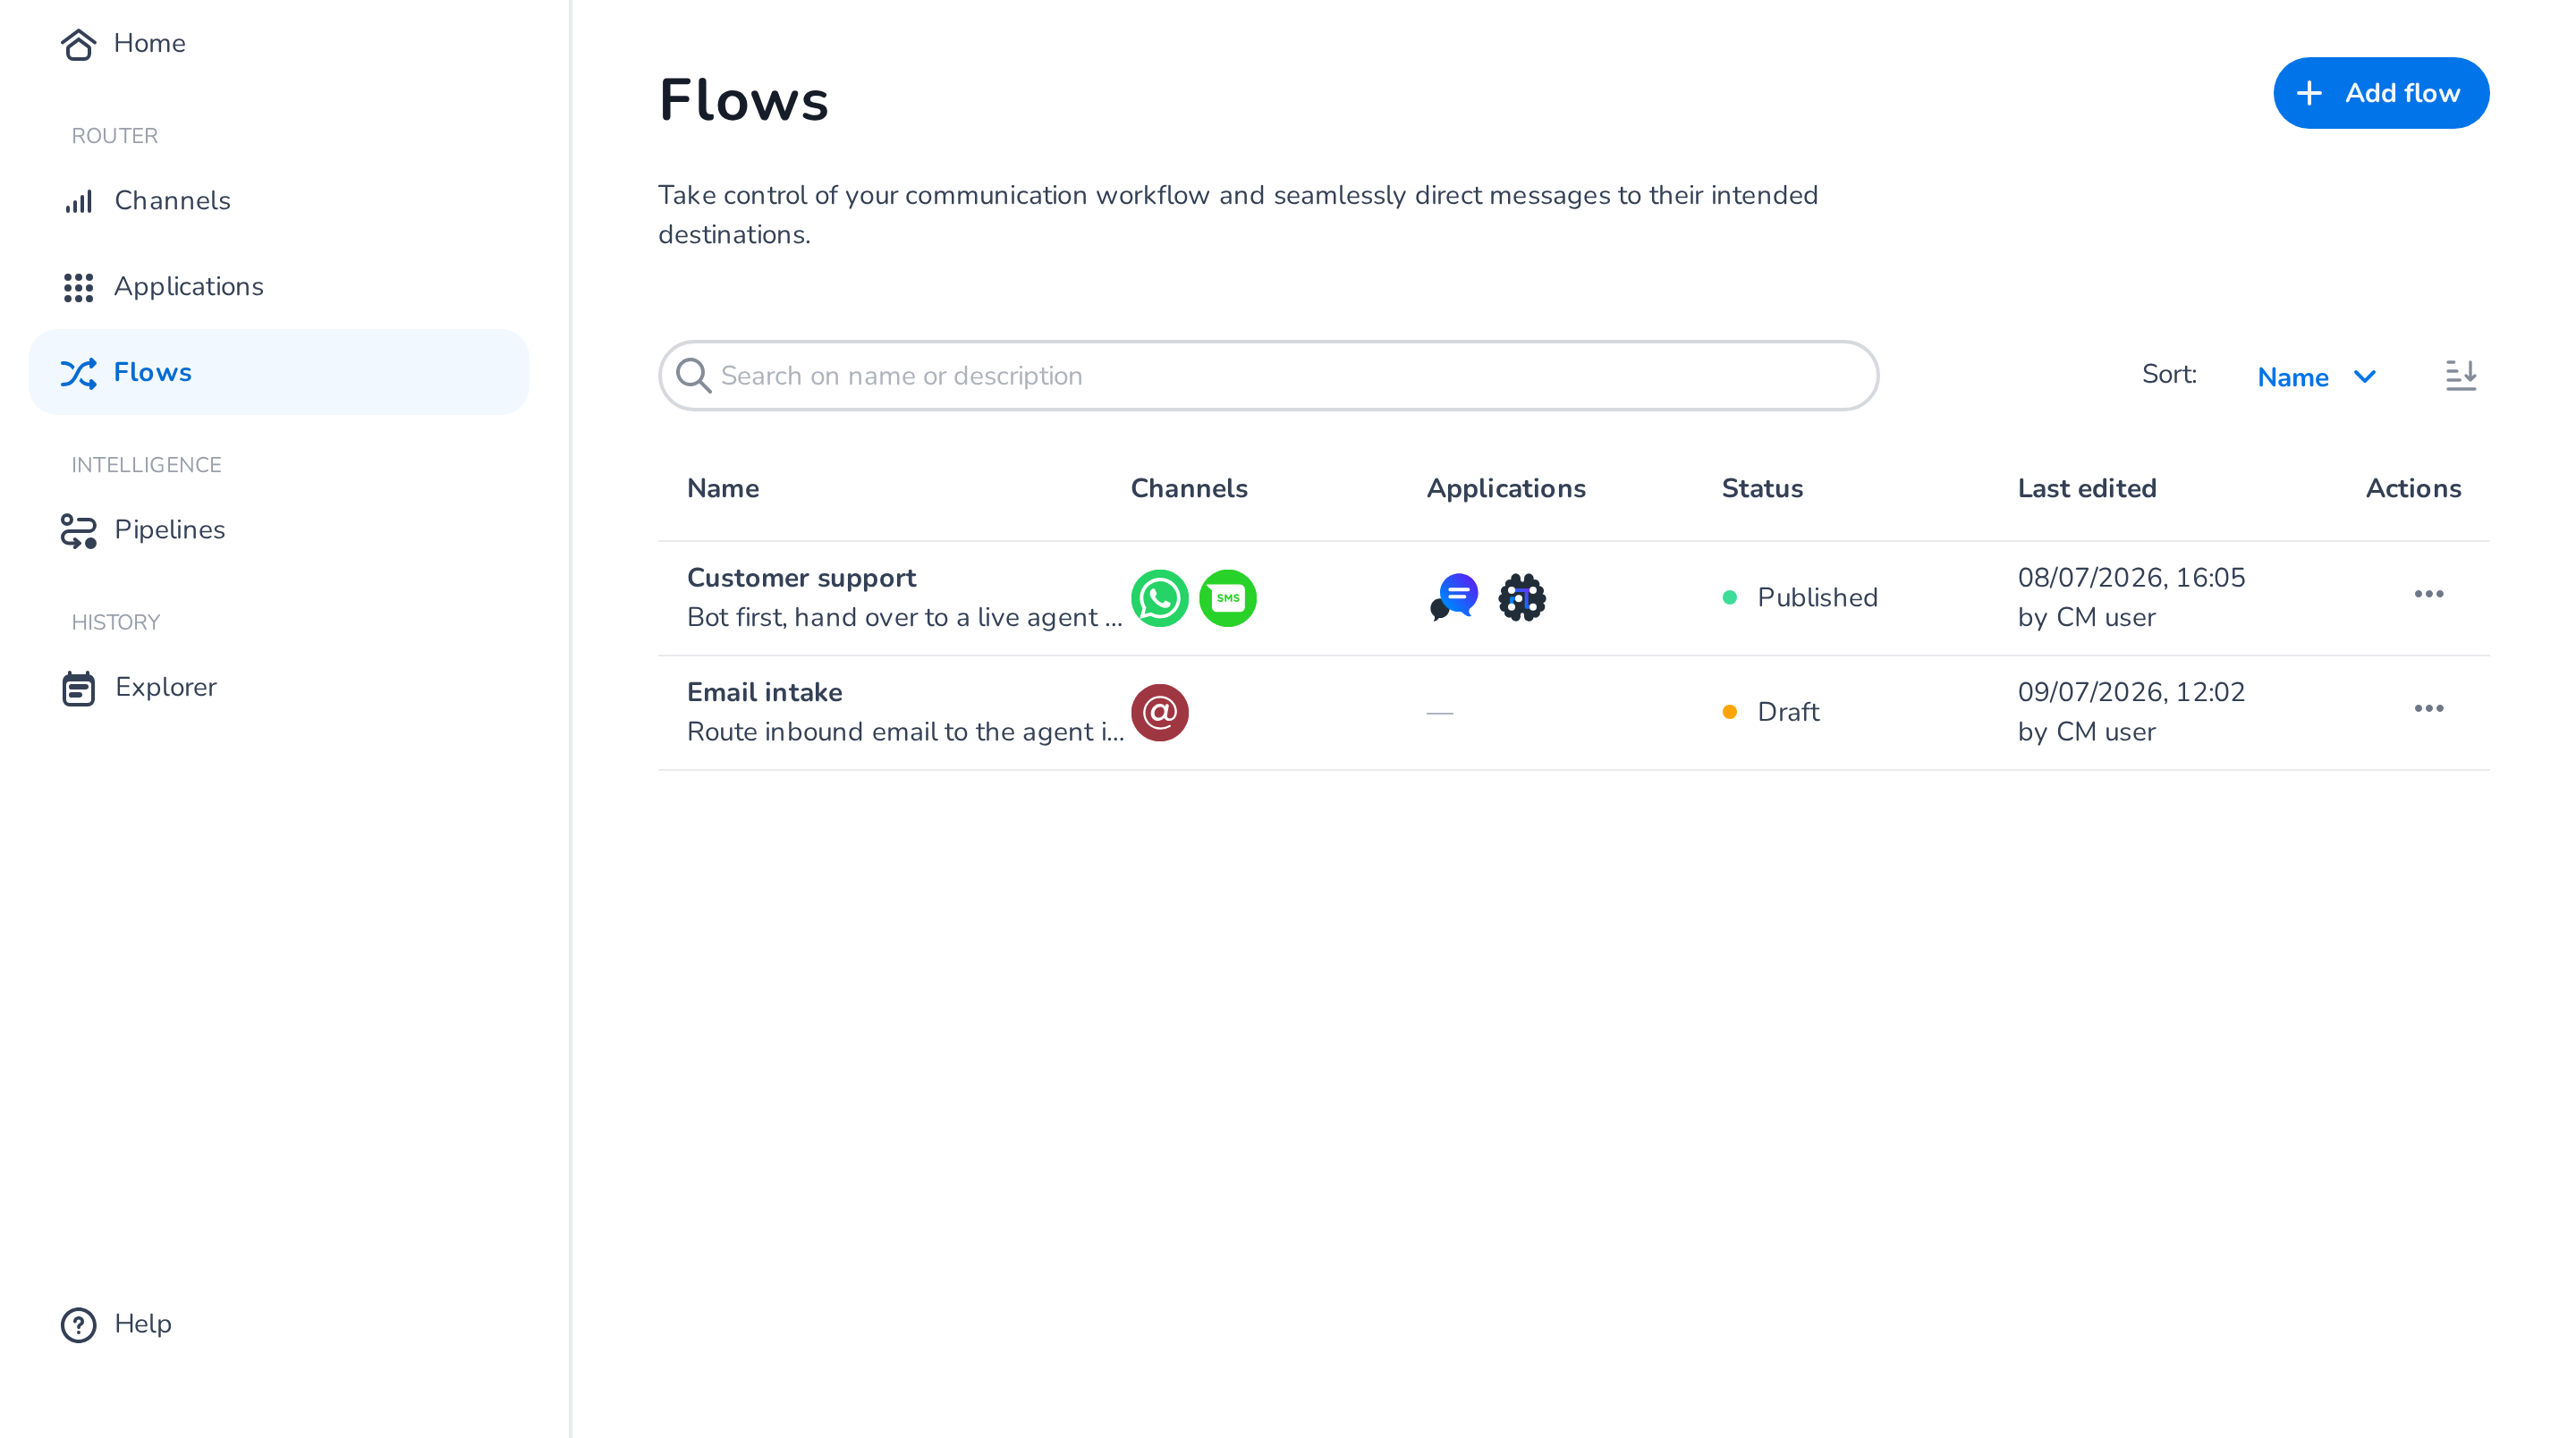
The list shows each flow's name and description, the connected channels and applications, its status (Published or Draft), and when and by whom it was last edited. You can search flows by name or description and sort by name or last edited.
Add flow
Click the Add flow button. You will be redirected to the flow editor, where you can configure it. Please see the Configuration section for more information.
Edit flow
Click a flow in the list, or open its Actions menu (three dots) and choose Edit.
Publish and unpublish from the list
The Actions menu also lets you Publish a draft flow or Unpublish a published one without opening the editor. See Publishing for the requirements.
Delete flow
Open the flow's Actions menu (three dots) and choose Delete, then confirm the deletion in the dialog.
❗️ Deleting a flow
Deletion is permanent and cannot be undone. Ensure the flow is no longer needed before proceeding. A published flow cannot be deleted. To delete it, first unpublish the flow.
Configuration
The flow editor is a single page where you design how conversations are routed:
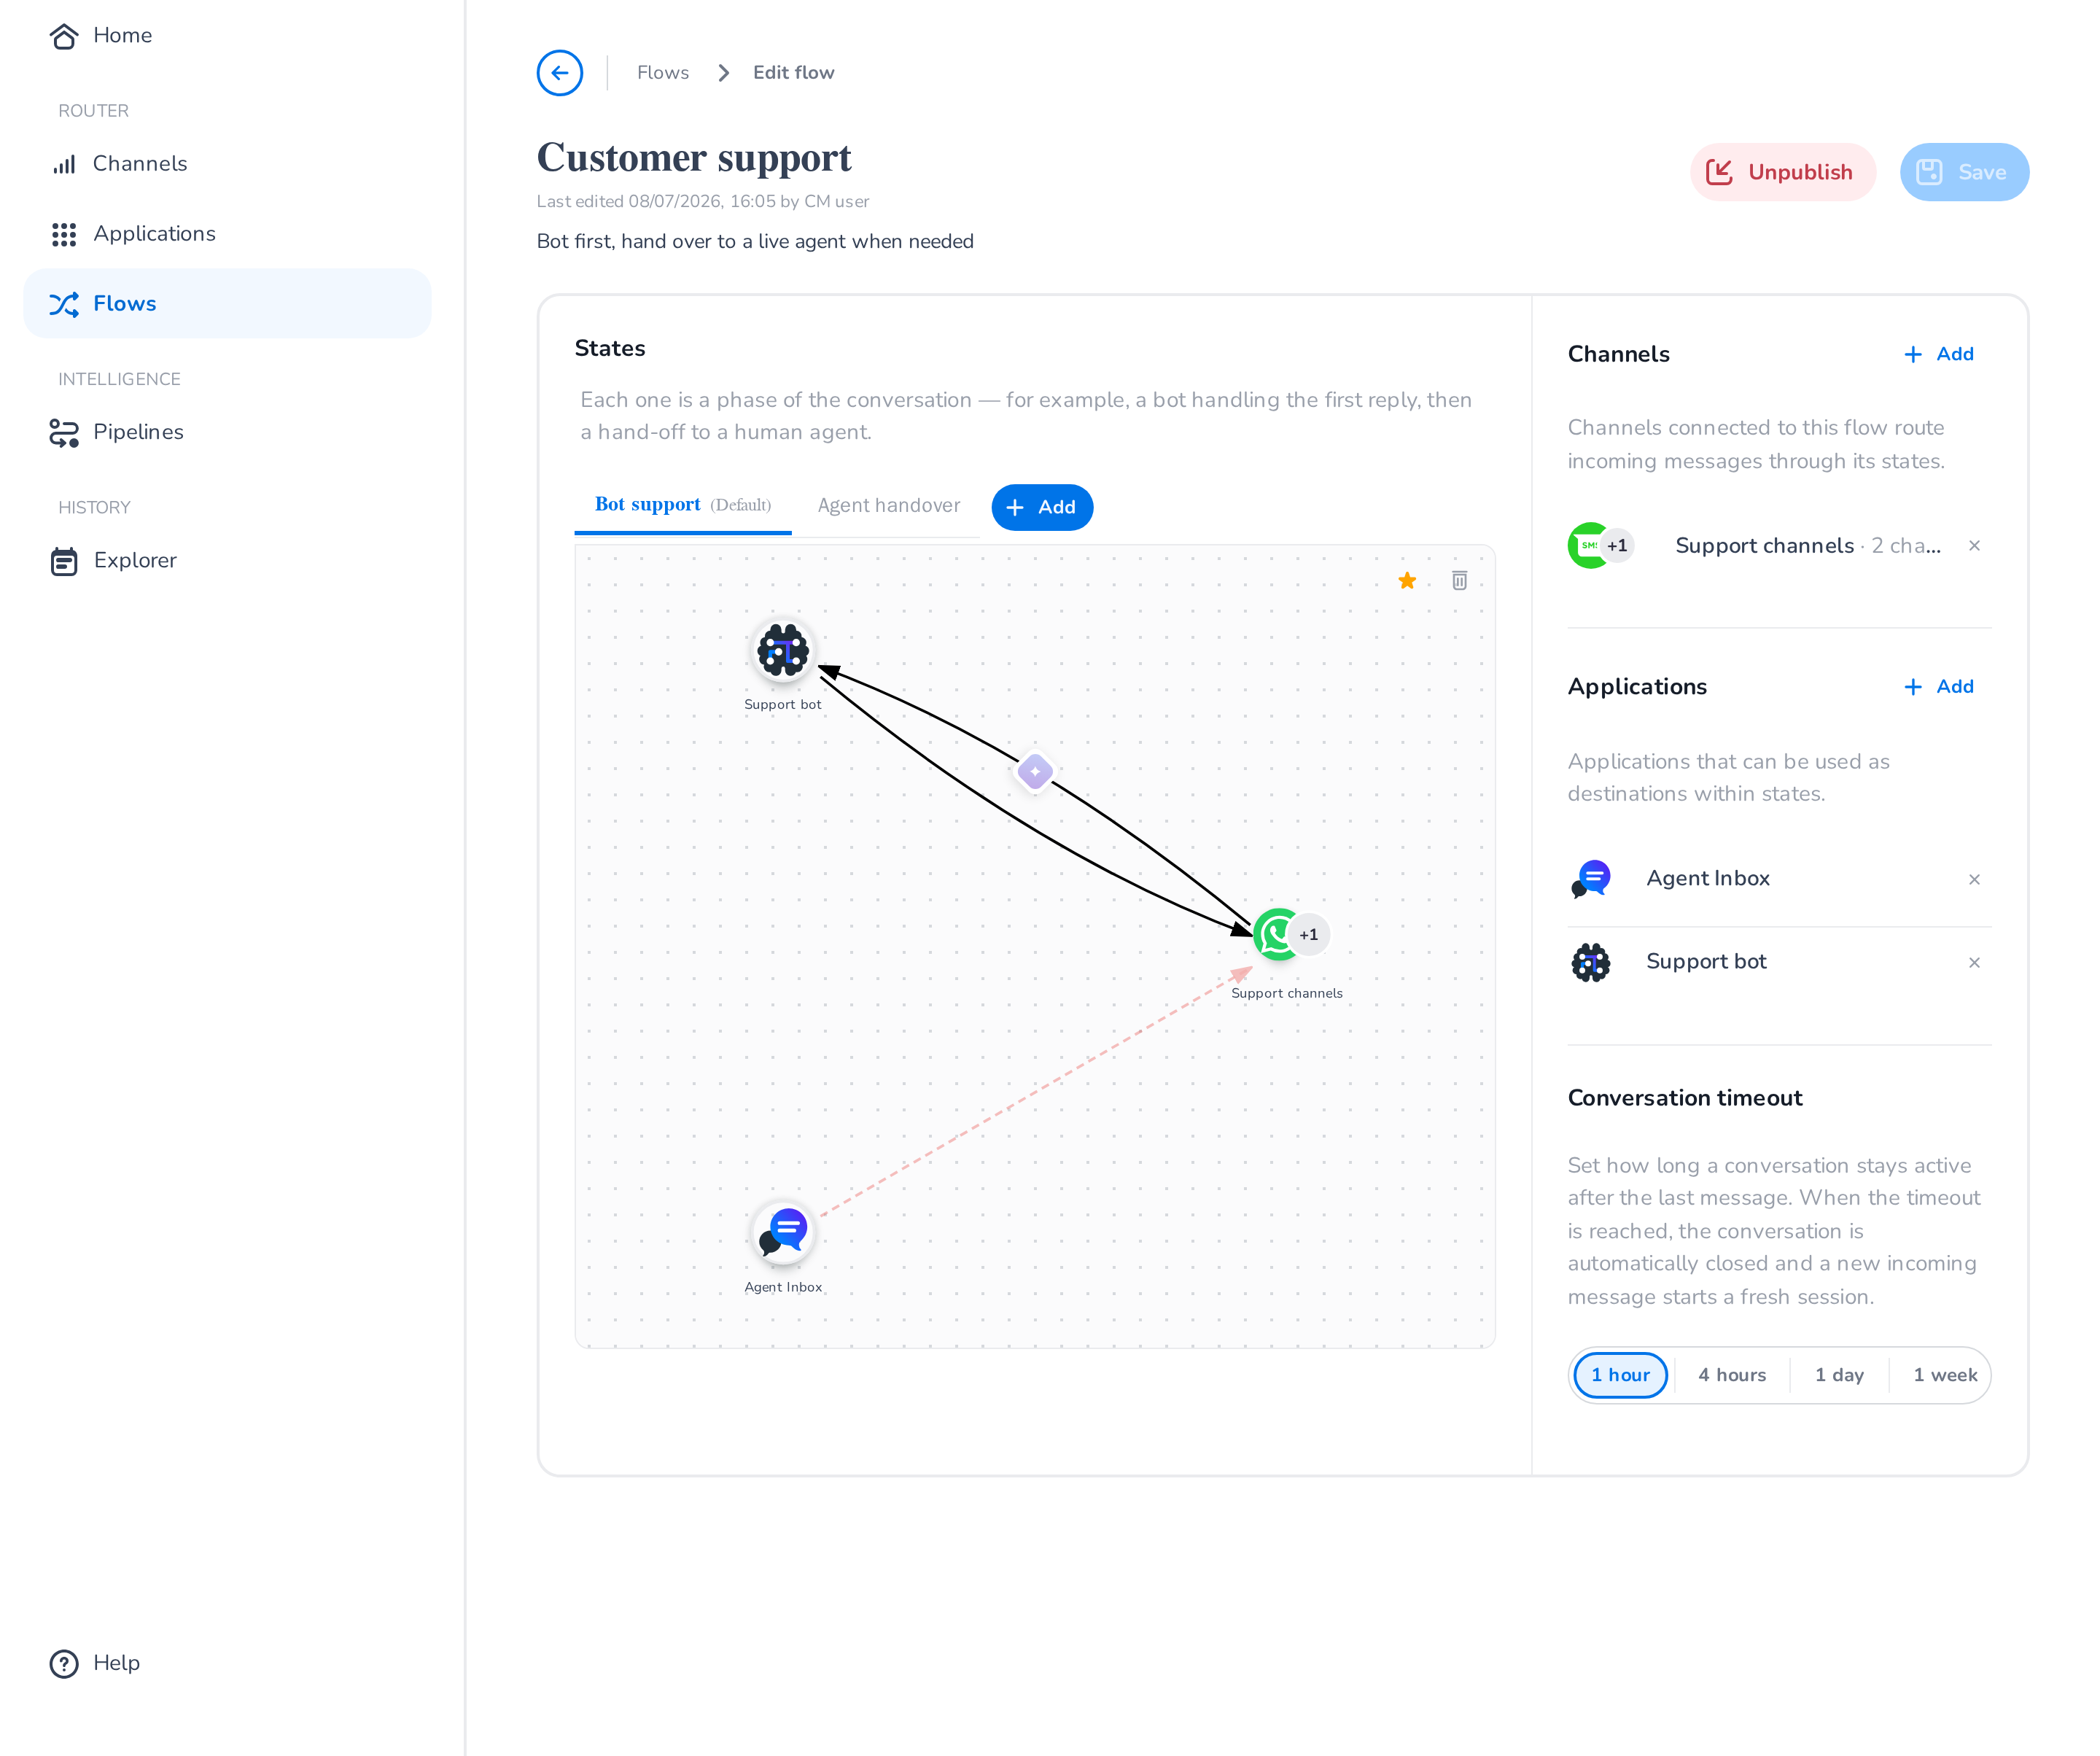
- The name and description are edited inline at the top of the page. Use a clear name and an optional description that states the purpose (for example, "Support – bot first, agent fallback").
- The States card is where you build the routing itself — see the States page for the concept and detailed guidance.
- The right-hand rail holds the flow's Channels, Applications, and Conversation timeout settings.
Your work is saved explicitly: the Save button stores your changes as a draft without affecting the published state, and Discard changes reverts them. If you navigate away with unsaved changes, the editor asks whether to save or discard them.
Channels and applications
Before you can use a channel or application inside a state, it must be connected to the flow. Use the Add buttons in the Channels and Applications sections of the editor's right-hand rail. Only connected channels, channel groups, and applications appear in the state editor.
- Channels route incoming messages through the flow's states. You can connect an individual channel or a channel group (see Channels); a group counts as a single connection that fans out to its members.
- Applications are the destinations messages can be routed to within states (for example Agent Inbox or an AI bot — see Applications).
📘 Connecting channels
A channel (or group) can be connected to only one flow at a time. If a channel is unavailable in the Add list, it is already connected to another flow.
🚧 Disconnecting a channel or application
If a connection is used by a link in any state of this flow, removing it also removes those links. Save is blocked for a published flow while a state has no links left.
Conversation timeout
The Conversation timeout setting determines how long a conversation stays active after the last message. When the timeout is reached, the conversation is automatically closed and a new incoming message starts a fresh session. Choose between 1 hour, 4 hours, 1 day (default), and 1 week — for example, pick 1 week when your customer service does not reply during the weekend and you want conversations to stay open.
States
States are edited directly inside the flow editor: each state is a tab above the canvas, and the routing within the selected state is drawn as a graph — drag a connection from a source to a target to create a link. For detailed guidance, see the States page.
Publishing
When you are ready to route traffic through a configured flow, publish it. Publishing makes the flow active: new messages are routed through it, starting in its default state.
Click the Publish button in the editor (or in the list's Actions menu) and confirm. After publishing, the flow's status changes to Published.
📘 Publish requirements
A flow can only be published when its configuration is complete: it must have a name, at least two connected channels/applications, at least one state, a default state, and every state must have at least one link. Any unsaved changes must be saved first. The Publish button's tooltip tells you which requirement is still missing.
If you need to deactivate a flow, Unpublish it. Unpublishing stops it from routing new messages. After confirming, the flow's status changes back to Draft.
🚧 Editing a published flow
You can keep editing a published flow, but saving re-validates the configuration — for example, you cannot save a published flow with a state that has no links.